

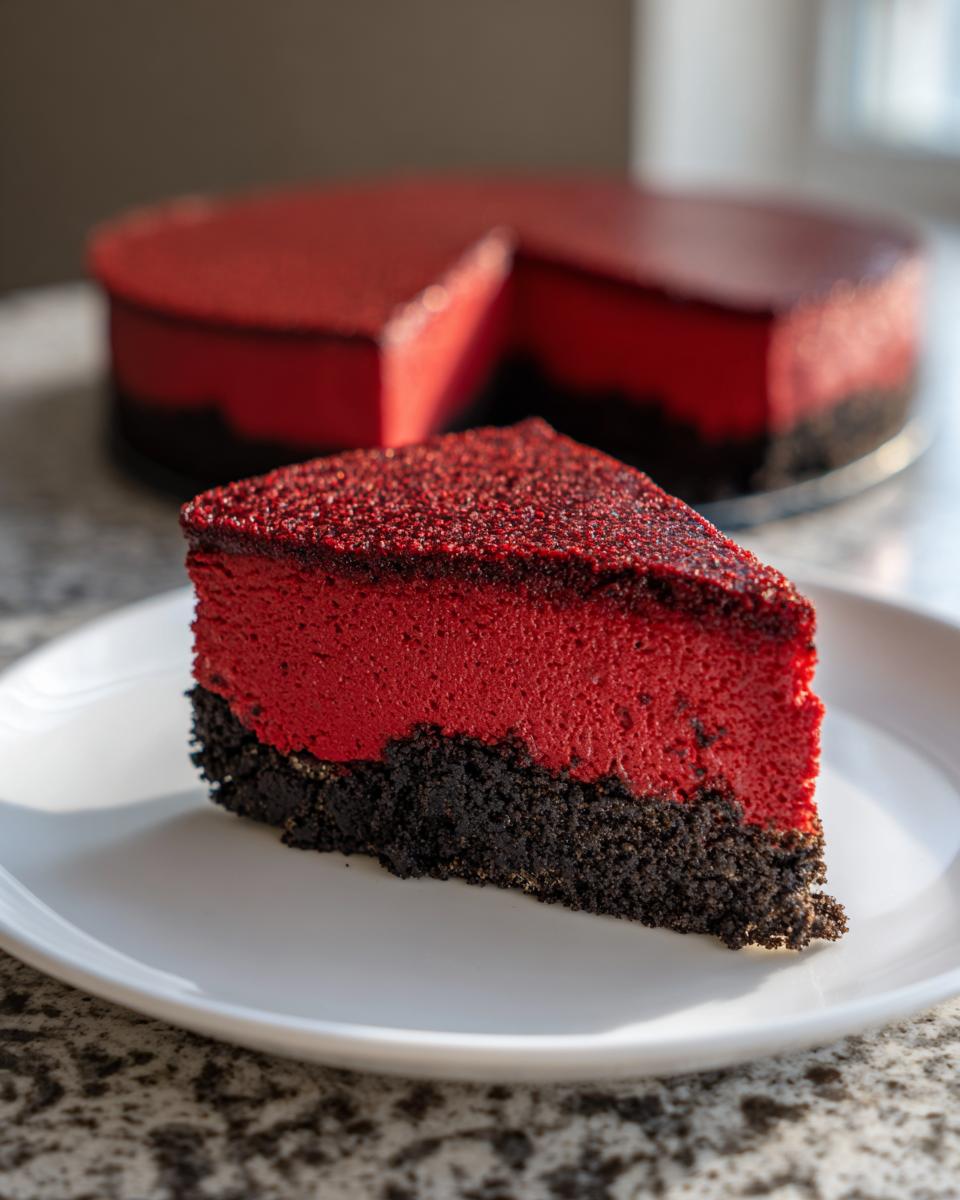
You know those desserts that stop you right in your tracks? The ones you see online and think, “No way is that actually achievable at my house”? Well, wipe that doubt away, because I’m pulling back the curtain on what I truly believe is the ultimate creamy red velvet cheesecake with that perfect, crunchy Oreo crust.
Here at Kitchen Slang, we’re about cutting through the noise and translating those high-level techniques so you can bake like a pro. That’s what Zoe Thompson always wanted—to take the scary, complex stuff and make it feel like second nature in your own kitchen. You can read more about that philosophy over on our About page. This recipe isn’t just a treat; it’s a masterclass in getting that decadent chocolate flavor and that flawless texture without needing a catering degree. Trust me, this showstopper will be your new favorite!
- Why This is the Best Red Velvet Cheesecake Recipe
- Ingredients for Your Showstopper Red Velvet Cheesecake
- How to Make Red Velvet Cheesecake: Step-by-Step Instructions
- Expert Tips for a Perfect Red Velvet Cheesecake
- Variations: Easy Red Velvet Cheesecake and Layered Red Velvet Cheesecake
- Serving and Storing Your Decadent Red Velvet Cheesecake
- Frequently Asked Questions About Red Velvet Cheesecake
- Estimated Nutritional Data for Red Velvet Cheesecake
- Share Your Festive Cheesecake Dessert Experience
Why This is the Best Red Velvet Cheesecake Recipe
I’ve tried a million versions, and I keep coming back to this one because it actually delivers on the promise of decadent flavor without all the drama. If you’re looking for the best red velvet cheesecake recipe out there, this is it. We nail that vibrant red color, but more importantly, we get that rich, unbelievably smooth mouthfeel. It’s less cakey and more pure, luscious indulgence. That’s why I stand by it.
Zoe learned early on working those crazy restaurant shifts that technique equals triumph, especially with cheesecake. That’s why the water bath feels overly fussy—it’s not fuss, it’s science! It keeps things gentle so you get that gorgeous, even bake. If you want the deep, dense perfection you see in those fancy bakery cases, you should check out my notes on getting that New York style texture right here. Honestly, if you follow the chilling instructions, you’re going to have the creamy red velvet cheesecake of your dreams.
Achieving the Ultimate Creamy Red Velvet Cheesecake Texture
Look, the secret to avoiding that grainy texture is simple: room temperature ingredients and patience. Your cream cheese must be truly soft, not just fridge-cool. When those eggs go in, add them one by one, mixing on that lowest speed. We want smooth, not airy! And please, don’t skip the water bath; it steams the edges gently, which is the key to eliminating those dreaded surface cracks we all hate.
Ingredients for Your Showstopper Red Velvet Cheesecake
Okay, time to gather the troops! When you’re making something this luxurious, ingredient quality really matters. We aren’t cutting corners here because every element plays a vital role in keeping this dessert impossibly creamy and richly flavored. Have everything out on the counter, ready to go, before you even think about turning the mixer on!
Oreo Crust Components
- 1 1/2 cups Oreo cookie crumbs
- 6 tablespoons unsalted butter, melted
Creamy Red Velvet Cheesecake Filling Ingredients
- 3 (8 ounce) packages cream cheese, softened
- 1 1/2 cups granulated sugar
- 1/4 cup all-purpose flour
- 1 teaspoon vanilla extract
- 1/2 cup sour cream
- 2 large eggs
- 1 tablespoon white vinegar
- 1 teaspoon cocoa powder
- 2 tablespoons red food coloring (liquid or gel)
- 1/4 cup buttermilk
How to Make Red Velvet Cheesecake: Step-by-Step Instructions
Alright, this is where the kitchen magic happens! Learning how to make red velvet cheesecake isn’t hard, but the order and feel of these steps are what separates a good cake from the showstopper we’re aiming for. Pull out your 9-inch springform pan and make sure you’ve got some heavy-duty foil ready. We wrap that pan tight—like a mummy—to keep the bathwater out later. Don’t skimp on the foil; trust me, you don’t want a soggy bottom!
Preparing the Red Velvet Oreo Cheesecake Crust
First thing’s first: get that oven preheated to 325°F (160°C), or it won’t be ready when your crust is mixed. In a bowl, just toss those lovely Oreo crumbs with the melted butter until it looks like damp sand. Now, press that mixture into the bottom of your prepared springform pan. You want it firm and even, so use the bottom of a measuring cup to pack it down tight. A hard press means it won’t crumble when you slice it later. Pop that pan in the oven for just 10 minutes. This little 10-minute head start sets the crust perfectly. Pull it out, let it hang out for a bit while we tackle the filling.
Mixing the Decadent Red Velvet Cheesecake Batter
This is the texture part, so slow down here and don’t get too aggressive with the mixer! Start by beating your softened cream cheese, sugar, and flour together until it looks creamy and smooth. Scrape those bowl sides down, because nobody likes hidden pockets of unmixed sugar. Next, gently mix in the vanilla and the sour cream until it just comes together. Now for the eggs—add them one at a time, and I mean *one at a time*. Mix only until the yolk disappears before adding the next one. If you overmix the eggs, you whip too much air in, and that’s how we get cracks and sinking! Oops!
In a separate, tiny bowl, whisk your vinegar, cocoa powder, buttermilk, and that vibrant red food coloring. You need to get that color really uniform here! Then, and this is important, gently pour this red liquid into your main cream cheese batter. Mix on the absolute lowest setting just until the color is evenly distributed. We want everything incorporated, but we’re not trying to make meringue here, okay?
Baking the Red Velvet Cheesecake with a Water Bath
Time to assemble and get gentle! Pour that beautiful red velvet batter right over your slightly cooled Oreo crust. Now, for the technique that sets the pros apart: the water bath. Set your foil-wrapped springform pan inside a larger roasting pan. Carefully pour hot water into that outer pan until it comes about halfway up the sides of your springform. This water bath is the secret weapon! It insulates the sides and keeps the heat gentle and moist, which is key to avoiding those annoying cracks and ensuring that incredibly creamy finish you’re looking for.
Bake it for about 60 to 75 minutes. The edges should look set, but if you gently nudge the pan, the very center should still have a tiny, nervous wobble. Don’t panic! When the time is up, turn the oven off completely, crack the door open just a tiny bit, and let it sit inside, cooling down slowly, for a full hour. This slow transition out of the heat stops the rapid shrinking that causes surface trauma. After that hour, take it out of the water bath, ditch the foil, and let it cool on the counter until it’s totally room temperature. After that, it needs mandatory chilling time! You can check out my quick dinner ideas while you wait for tomorrow morning to take the first bite!
Expert Tips for a Perfect Red Velvet Cheesecake
Now that you know the steps, let’s talk about tweaking for pure perfection. This amazing red velvet cheesecake balances chocolate and tang so brilliantly, and how you handle that color is huge! I learned that liquid food coloring just waters down your perfect batter, so ditch it. You absolutely need a good quality gel coloring if you want that signature vibrant red that honestly screams ‘special occasion’.
My favorite structure isn’t layered with actual cake—it’s just cheesecake on that crisp Oreo base—but you can always stack a thin layer of actual red velvet sheet cake right on top of the finished, chilled cheesecake! Remember to keep that little bit of cocoa powder—it’s what stops the whole thing from tasting like sweet cream cheese and gives it that necessary, deep chocolate note. For more inspiration on achieving that incredible texture, check out this resource here.
Color Intensity and Flavor Balance in Red Velvet Cheesecake
If you rely on liquid coloring, you end up adding too much, which messes with the set. Gel is your best friend for that stunning hue! Also, make sure you use good quality cocoa powder—even a teaspoon makes a difference when balancing the sweetness. That little bit of cocoa, reacting with the vinegar and buttermilk, is what creates that classic red velvet depth. Don’t skip it just because you can’t see big chocolate chunks!
Variations: Easy Red Velvet Cheesecake and Layered Red Velvet Cheesecake
I know sometimes you just don’t have the weekend to dedicate to a full bake—and that’s totally fine! This recipe is super adaptable. Whether you want something easy red velvet cheesecake for a last-minute gathering or you’re dreaming up a proper structural masterpiece, we can make it happen.
I’ve seen people get really creative with this base, turning it into that amazing layered red velvet cheesecake situation. Some folks just bake this recipe as directed, then top it with a layer of actual red velvet sheet cake mix baked separately and frosted over. It looks incredible for a holiday platter! If you’re looking for other less-involved desserts, you should check out my recipe for no-bake pumpkin cheesecake for inspiration!
Making a No Bake Red Velvet Cheesecake Version
If you’re pressed for time, forget turning on the oven! For a no bake red velvet cheesecake, you skip all that water bath drama. Instead, mix up the batter but skip the eggs and vinegar! You’ll fold in 1/2 cup of heavy cream whipped to stiff peaks before pouring it over that set Oreo crust. Then you just chill the whole thing in the fridge for about four hours until it sets up beautifully firm. You can see some ideas over on this page about combining cake and cheesecake, too!
Serving and Storing Your Decadent Red Velvet Cheesecake
Getting this far means you’ve made a truly decadent chocolate cheesecake masquerading as a festive centerpiece! When you finally take that red velvet cheesecake out after its long rest in the fridge, don’t just plop it on a plate. A great presentation is everything for a showstopper! A swirl of homemade cream cheese frosting or even just some bright red velvet cake crumbs sprinkled around the edge takes this over the top.
Keeping this beauty fresh is easy. Cover it tightly and keep it chilled; it tastes even better the next day once the spices have married! For lots of amazing dessert ideas, check out my collection of delicious dessert recipes. And if you want to see how others served up their amazing results, take inspiration from these folks here!
Frequently Asked Questions About Red Velvet Cheesecake
It’s normal to have questions when tackling a dessert this big! Cheesecake can feel finicky, but once you know the little chef tricks, you’ll realize how simple it is to deliver a showstopper every time. Don’t worry; we’re covering the stuff that trips everyone up—like keeping that color bright and getting that creamy interior without any lumps or cracks.
Can I make this red velvet cheesecake ahead of time?
Oh, absolutely, and I highly encourage it! This recipe is actually much better when you make it a day ahead. The flavors need time to settle down and deepen, especially that slight tang from the buttermilk and vinegar. Plus, it needs that minimum six hours—or preferably overnight—of chilling time for the texture to firm up properly along that Oreo crust. Trying to slice it warm? That’s just a recipe for messy disaster, so plan ahead for serving this festive cheesecake dessert.
What is the best way to get an intense red color in my red velvet cheesecake?
This is all about chemistry, my friend! Skip the liquid drops if you want that brilliant crimson color. Liquid coloring just adds unnecessary moisture, which means you’ll have to adjust the other wet ingredients, or worse, break your emulsion. You need a good quality gel food coloring. The trick Zoe taught me is to mix that gel right into your little bowl with the acidic buttermilk and white vinegar first. The acid helps ‘activate’ or deepen the red color when it mixes into the batter. It makes such a difference!
If you’re looking for more straightforward baking ideas that still pack a punch, take a peek at my favorite easy chocolate chip cookie recipe. Sometimes you need a simple win, right?
Estimated Nutritional Data for Red Velvet Cheesecake
I always like to give a heads-up on the nutrition facts, just so everyone knows what they’re diving into with this unbelievably decadent chocolate cheesecake! Remember, this is just an estimate we pulled together based on the standard ingredients listed above. If you swap out butter for coconut oil because you’re feeling adventurous, all these numbers are going to shift around. We are aiming for deliciousness here, not a strict dietary plan, right?
The final recipe yields about 12 generous slices. If you eat the whole thing solo, well, that’s a personal choice we won’t judge here! But for a proper slice of that red velvet cheesecake goodness, here is the breakdown based on the recipe card:
- Serving Size: 1 slice
- Calories: 450
- Sugar: 35g
- Sodium: 320mg
- Fat: 30g
- Saturated Fat: 18g
- Unsaturated Fat: 12g
- Trans Fat: 0.5g
- Carbohydrates: 40g
- Fiber: 1g
- Protein: 7g
- Cholesterol: 95mg
Please take these numbers loosely! Since we are focusing on real butter and real cream cheese to get that perfect creamy texture, the fat content is definitely where it should be for a classic, rich cheesecake. Use good quality cocoa and cream cheese, and those numbers might just swing in your favor!
Share Your Festive Cheesecake Dessert Experience
Whew! You’ve officially pulled off one of the most triumphant desserts out there. Making a showstopper like this red velvet cheesecake is no small feat, and now I really, really want to hear all about it! Did the Oreo crust hold up? Did your color come out perfectly vibrant? Don’t keep all that success a secret!
Please head down to the comments below and leave a quick rating for this festive cheesecake dessert. Tell me how it went—did you use cream cheese frosting or just keep it simple? Seeing your results is what makes all this kitchen translating worthwhile. If you made any brilliant substitutions or you want to show off the beautiful slice you served up, please snap a photo!
If you want to show off your impressive bake or need to reach out about a tricky step, you can always get in touch with me directly on the Contact page. And hey, if you’re dreaming about your next baking project, go check out the incredible recipes others have shared, like this amazing take on the Oreo version shared by experts over here. Happy baking, and enjoy every single decadent bite!
PrintThe Ultimate Creamy Red Velvet Cheesecake with Oreo Crust
Make a stunning, showstopper red velvet cheesecake featuring a rich Oreo crust and a creamy, decadent filling. This recipe fuses the best of red velvet cake and classic cheesecake for a festive dessert.
- Prep Time: 25 min
- Cook Time: 75 min
- Total Time: 9 hours 40 min
- Yield: 12 servings 1x
- Category: Dessert
- Method: Baking
- Cuisine: American
- Diet: Vegetarian
Ingredients
- 1 1/2 cups Oreo cookie crumbs
- 6 tablespoons unsalted butter, melted
- 3 (8 ounce) packages cream cheese, softened
- 1 1/2 cups granulated sugar
- 1/4 cup all-purpose flour
- 1 teaspoon vanilla extract
- 1/2 cup sour cream
- 2 large eggs
- 1 tablespoon white vinegar
- 1 teaspoon cocoa powder
- 2 tablespoons red food coloring (liquid or gel)
- 1/4 cup buttermilk
Instructions
- Preheat your oven to 325°F (160°C). Wrap the outside bottom of a 9-inch springform pan tightly with heavy-duty aluminum foil.
- Prepare the crust: Mix the Oreo crumbs and melted butter in a bowl until combined. Press the mixture firmly into the bottom of the prepared springform pan. Bake for 10 minutes. Remove from oven and let cool slightly.
- Prepare the filling: In a large bowl, beat the softened cream cheese, granulated sugar, and flour with an electric mixer until smooth. Scrape down the sides of the bowl.
- Beat in the vanilla extract and sour cream until just combined. Add the eggs one at a time, mixing on low speed after each addition until incorporated. Do not overmix.
- In a small bowl, whisk together the white vinegar, cocoa powder, red food coloring, and buttermilk until the color is uniform.
- Gently mix the red liquid mixture into the cream cheese batter until the batter is evenly colored.
- Pour the red velvet cheesecake batter over the cooled Oreo crust.
- Place the foil-wrapped springform pan into a larger roasting pan. Carefully pour hot water into the roasting pan until it reaches about halfway up the sides of the springform pan (this is a water bath).
- Bake for 60 to 75 minutes, or until the edges are set but the center still has a slight jiggle.
- Turn off the oven, prop the oven door open slightly, and let the cheesecake cool inside the oven for 1 hour.
- Remove the cheesecake from the water bath and foil. Let it cool completely on a wire rack.
- Once cool, cover and refrigerate for at least 6 hours, or preferably overnight, before serving.
Notes
- For a showstopper presentation, top the chilled cheesecake with a layer of cream cheese frosting or stabilized whipped cream before serving.
- If you prefer a no bake red velvet cheesecake, chill the filling mixture for 4 hours instead of baking. Use 1/2 cup heavy cream whipped to stiff peaks folded in for a lighter texture.
- Use gel food coloring for the most intense, vibrant color without adding too much liquid.
Nutrition
- Serving Size: 1 slice
- Calories: 450
- Sugar: 35g
- Sodium: 320mg
- Fat: 30g
- Saturated Fat: 18g
- Unsaturated Fat: 12g
- Trans Fat: 0.5g
- Carbohydrates: 40g
- Fiber: 1g
- Protein: 7g
- Cholesterol: 95mg