
Let’s be honest, sometimes the side dish gets ignored, right? We focus all our energy on the main event, and the rice ends up being just… fine. Well, that stops today! I want to introduce you to my absolute favorite way to turn a boring grain into something truly special. This **rice pilaf recipe** is the gold standard in my kitchen because it guarantees that light, fluffy texture and deep, savory flavor everyone chases. And here’s the best part: it’s actually ready in under 30 minutes! When I started Kitchen Slang, my goal was translating those insider tricks chefs use—like taking the time to toast the rice—so you don’t have to flip through intimidating cookbooks. This pilaf uses that exact professional technique to make your next batch of rice anything but ordinary. If you’re looking for the perfect **quick side dish recipe** to change weeknight dinners forever, stick around. You can check out more of my favorite easy weeknight dinners later!
- Why This Rice Pilaf Recipe Delivers Fluffy Perfection
- Gathering Ingredients for Your Easy Rice Pilaf Recipe
- Step-by-Step Instructions for How to Make Rice Pilaf From Scratch
- Customizing Your **Savory Rice Side Dish** Variations
- Tips for the Best Rice Pilaf Every Time
- Storage and Reheating Instructions for Homemade Rice Pilaf
- Frequently Asked Questions About This Rice Pilaf Recipe
- Nutritional Estimates for This Rice Pilaf Recipe
- Share Your Rice Pilaf Recipe Success
Why This Rice Pilaf Recipe Delivers Fluffy Perfection
If you’ve ever made rice that came out sticky or gummy, I get it! That’s why I want to show you the steps that separate a decent side dish from truly great one. This **fluffy rice pilaf** isn’t magic, it’s just applying a couple of professional chef moves right there on your stovetop. Trust me, once you see how easy it is to do this right, you’ll never go back to just dumping rice in water!
The Secret to Buttery Rice Pilaf Texture
The absolute cornerstone for light, non-sticky perfection is toasting the grains first. Before we add a drop of broth, we sauté the rice—and that optional orzo works wonders here too—in fat. We’re basically creating a little shield around each grain of rice with that butter and oil. This genius step seals the starch, which is exactly what stops everything from clumping together later. This is the bedrock of any truly **homemade rice pilaf** worth raving about.
Flavor Foundations: Broth and Sauté
Next up is flavor building, and it happens early! We aren’t using boring water here. We are building layers using sautéed onions, garlic, and most importantly, quality liquid. Using **rice pilaf with chicken broth** adds a savory depth that you just can’t get any other way. When those onions soften and release their sweetness, while the garlic gets fragrant, you create that rich base for a truly **aromatic rice recipe** that smells incredible the moment it starts bubbling.
Gathering Ingredients for Your Easy Rice Pilaf Recipe
Okay, let’s talk stuff! You need to have everything ready before you start because once that rice hits the hot butter, things move fast! I’ve broken down exactly what you need below. Don’t worry, it’s all pantry staples, but how you prep them matters huge when you’re aiming for that perfect, separate grain.
We’re going for precision here so we don’t mess up that delicate toasting stage. Make sure your onion is finely chopped—no big chunks allowed that won’t soften right. And your garlic? It needs to be minced; we want every bit of flavor without any sharp, raw bites getting through. Having everything measured out, what we chefs call *mise en place*, is the real secret to making this a true easy rice pilaf recipe!
Ingredient Notes and Substitutions for **Rice Pilaf Recipe**
I know every kitchen is a little different, so let’s tweak things to work for your pantry. If you’re grabbing rice, I usually stick to a good quality, long-grain white rice, like a converted or Basmati. They hold their shape the best. If you use Basmati, sometimes you might want to give it a quick rinse, but honestly, for this specific method—where we toast it—I often skip the rinse because we want that dry starch to toast up nicely!
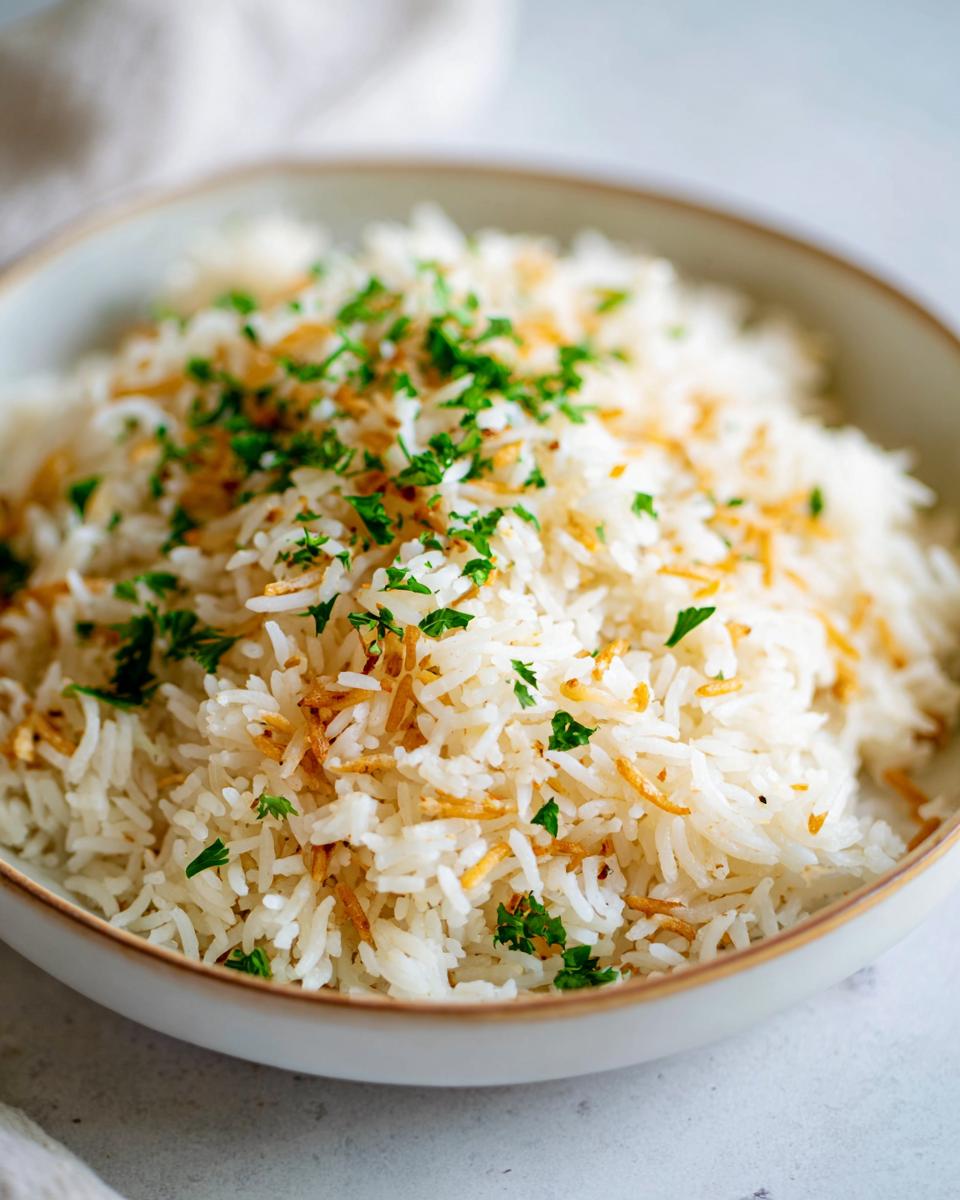
Now, about that orzo! That little pasta bit is optional, but wow, it adds such a lovely, nutty dimension and a slight chewiness that really elevates this beyond just plain rice. If you want a truly rich, savory rice side dish, swap out the chicken broth listed in the main recipe for beef consommé instead. It adds incredible depth, and that’s one of those little chef secrets I picked up!
Step-by-Step Instructions for How to Make Rice Pilaf From Scratch
Alright, time to get cooking! This is where we translate those professional moves into dinner success. Don’t rush; momentum is your friend here, but precision pays off big time in the final texture. We’re making the kind of pilaf recipe under 30 minutes that tastes like you spent all afternoon fussing over it. Keep your eye on the pot!
Toasting Grains and Building Flavor in This Rice Pilaf Recipe
First, get that butter and oil hot in the saucepan over medium heat. If you’re adding orzo, toss it in right away! You need to stir it constantly until it looks light golden brown—it should smell wonderfully nutty. Don’t walk away during this part, or it scorches fast! Once the orzo is happy, throw in your onion and let it soften up, about four minutes. Then bring in the garlic for just one minute until you can really smell it. The big moment comes next: add your rice! Stir it all around for two or three full minutes until you see the edges of those grains start to look a little translucent, almost pearly. That toasting step is pure gold for a perfect homemade rice pilaf.
Simmering and Steaming for a Fluffy Rice Pilaf
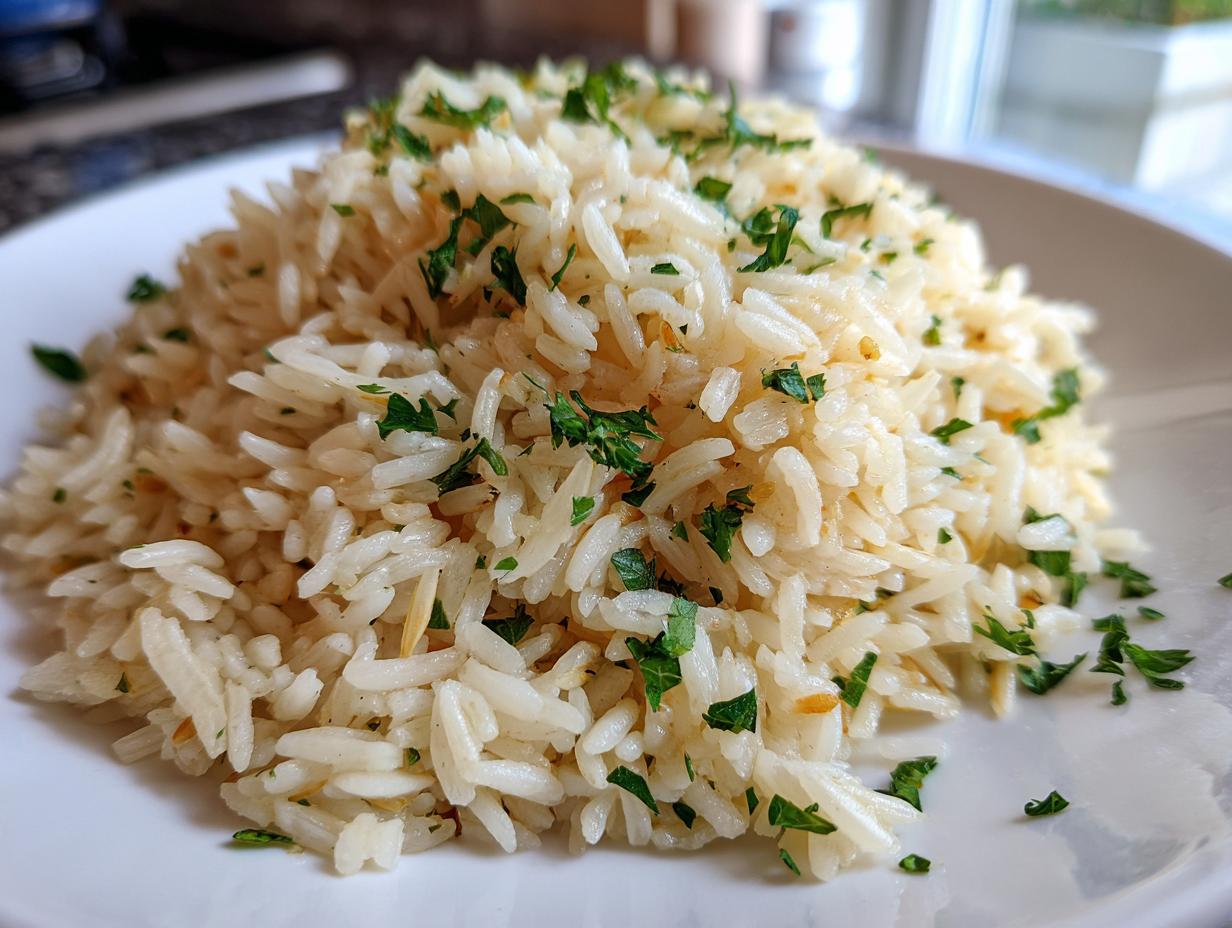
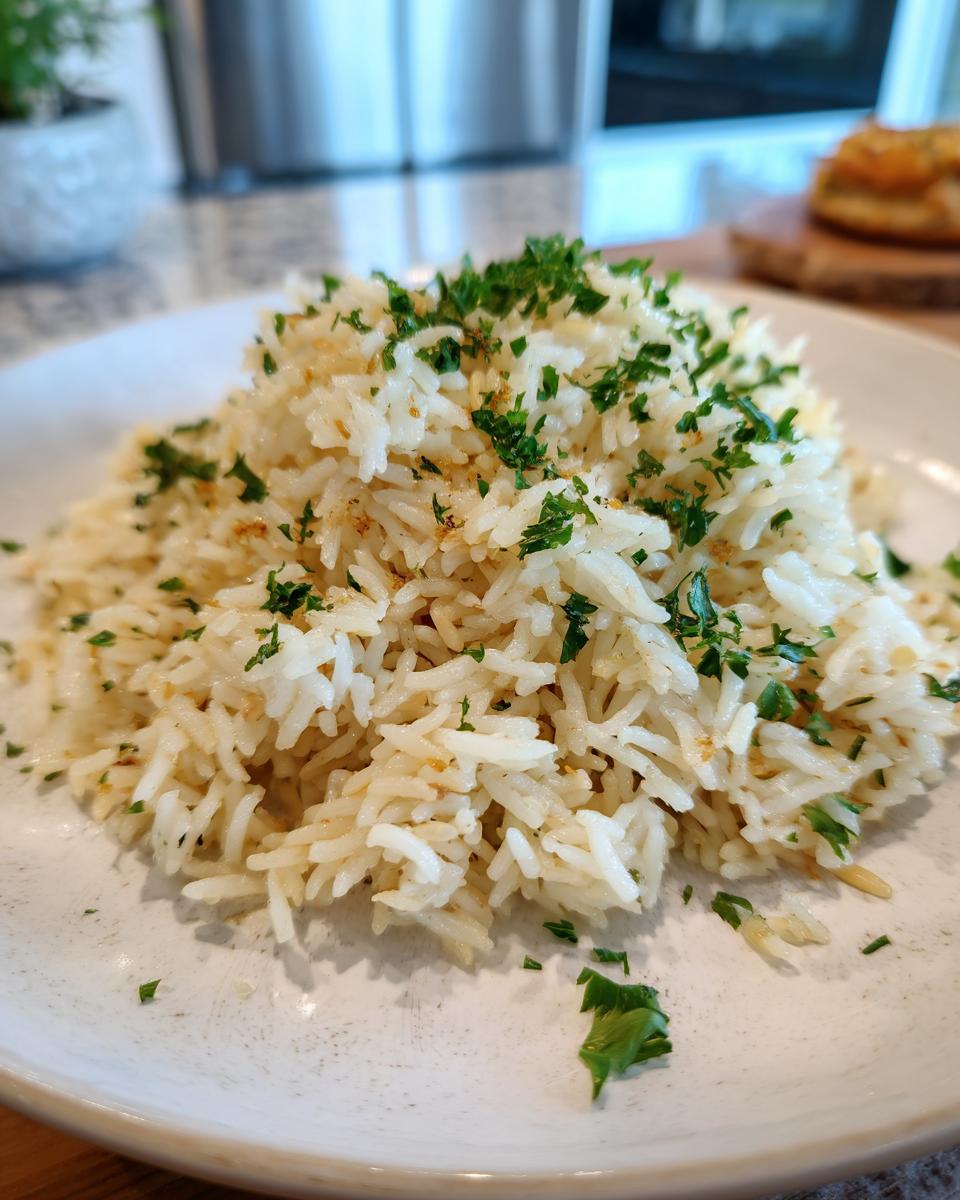
Once everything looks toasted and happy, pour in your broth, salt, and pepper. Bring that mixture up to a rolling boil—you want to see big bubbles—and then, whoa, cut the heat immediately! Turn it down to the absolute lowest setting you have. Cover it TIGHTLY. For the next 15 minutes, you absolutely cannot lift that lid! I mean it; don’t sneak a peek! That trapped steam is essential for cooking the rice evenly. After 15 minutes, turn the burner OFF completely, but leave the lid on for 10 more minutes of resting. This final steam is what guarantees your grains separate beautifully. We’re halfway to the best savory rice side dish ever!

Customizing Your **Savory Rice Side Dish** Variations
See? That was remarkably fast, wasn’t it? This **rice pilaf recipe** is fantastic on its own, but what I really love about simple techniques like this is how much room you have to play! This pilaf should feel like a canvas—something versatile that fits whatever else is on the dinner table. You don’t have to stick to the basic onion and garlic base if you don’t want to.
If you want to make this feel a little more gourmet instantly, try adding some toasted slivered almonds or maybe some vibrant dried cranberries right when you fluff the rice at the very end. Those little pops of crunch and sweetness are fantastic against the savory grains. Also, remember what I mentioned earlier about the liquid? If you want that deep, almost beefy richness—even though this is technically vegetarian—swap that **rice pilaf with chicken broth** for beef consommé. It’s an unbelievable flavor boost for a **quick side dish recipe**!
When you start customizing like this, you stop just following instructions and start cooking with intuition! If you want more ideas for mixing and matching, you should totally bookmark my easy chili recipe; sometimes I serve this pilaf right alongside it, and the contrast is amazing.
Tips for the Best Rice Pilaf Every Time
Okay, we nailed the golden rules—toasting the rice and resting it—but I want to give you a couple more kitchen slang tricks that ensure this **classic rice pilaf** is perfect every single time you make it. These are the tiny details that chefs obsess over, and now you can too, without stressing out!
First, let’s talk heat transfer. When you’re about to pour your liquid onto the hot rice and aromatics (Step 6), please, use hot broth! I mean it—make sure your **rice pilaf with chicken broth** is simmering on the stove before it hits the pan. If you pour in cold broth, it drops the temperature of the whole mixture immediately. That temperature shock disrupts the cooking process, and suddenly, your 15 minutes of simmering turns into 25 minutes of mushy edges and undercooked centers. Hot liquid keeps the cooking momentum going steady.
My next crucial tip is about that final fluff. When the resting time is up, you have to resist reaching for a regular spoon. A spoon scoops and mashes the delicate steam-cooked grains together. Instead, grab a fork—a regular dinner fork—and gently drag it through the rice, lifting and tossing it lightly. You’re essentially fluffing a cloud! This motion separates those nice, long grains perfectly, maximizing that beautiful, fluffy texture we worked so hard for.

This is the kind of wisdom—the why behind the what—that makes cooking so much more fun. If you’ve mastered this pilaf, you might want to try making some easy garlic naan bread next time to serve alongside it! Trust me, using hot components is a game-changer for any **long grain rice recipe**.
Storage and Reheating Instructions for Homemade Rice Pilaf
So, you made this incredible, fluffy **rice pilaf recipe** and you have leftovers! Hello, easy dinner win for tomorrow! Store your **homemade rice pilaf** properly so it stays delicious and doesn’t turn into a solid brick in the fridge. You want to let the leftovers cool down slightly—don’t put a piping hot container straight into the fridge, that’s a food safety no-no and it creates condensation which leads to sogginess.
Once it’s cooled a bit, transfer the pilaf into an airtight container. It keeps beautifully in the refrigerator for about three to four days, making it one of those fantastic backup options for **easy weeknight side dishes**. Seriously, knowing you have this flavorful rice waiting makes getting dinner on the table so much less stressful!
Now, reheating is where a lot of people mess up those beautiful fluffy grains we worked so hard to create. The key to reheating any rice dish is steam, not just dry heat. When you reheat it directly in a pan or microwave, it tends to dry out quickly. My trick? Add just a splash—maybe a tablespoon or two—of water or extra broth to the rice before you cover it.
If you’re using the microwave, cover it with a damp paper towel over the top of the container before zapping it in short bursts. If you’re using a stovetop, put it in a saucepan with that splash of liquid and cover it on low heat until the steam warms everything through evenly. This little bit of moisture gets absorbed, brings back that tender texture, and keeps your pilaf from getting crunchy. It tastes almost as good as fresh!
Frequently Asked Questions About This Rice Pilaf Recipe
I always knew you’d have questions, which is totally fine! That’s how we learn the lingo, right? Dealing with grains can sometimes feel tricky, but once you know the cheat codes, it’s a breeze. Here are some things people often ask me when they’re making their first batch of this quick side dish!
Can I use brown rice in this easy rice pilaf recipe?
You totally can, but you have to accept that this won’t be a “under 30 minutes” meal anymore. Brown rice is much tougher than the long-grain white rice we used for the perfect texture here. If you use brown rice, you need way more liquid, usually about 2 to 2 1/4 parts liquid for every 1 part rice, and you must increase your simmering time significantly—maybe 40 minutes instead of 15! Then, let it rest for even longer afterward. It works, but it changes the whole speed of the **easy rice pilaf recipe**.
What is the best liquid ratio for fluffy rice pilaf?
For the white rice we are using in this recipe—especially because we toast it first—the 1 part rice to 1.5 parts liquid ratio is my non-negotiable golden rule. That 1:1.5 ratio is what gets you that incredible **fluffy rice pilaf**. It seems low compared to standard boiled rice, but remember, we toasted the grains, and that resting period after taking it off the heat does almost half the cooking via steam! If you switch to a different rice, you absolutely must adjust your expectations for that perfect outcome in this **long grain rice recipe**—but stick to 1:1.5 for the best results here!
How do I make this a main dish using rice pilaf with chicken broth?
That’s something I love to do for an extra simple dinner when I’m exhausted! If you want to use this as a full meal, wait until the very last step, right when you’re fluffing the rice with the parsley. At that point, stir in some pre-cooked protein. Shredded rotisserie chicken mixes in beautifully and heats up immediately in the residual warmth. Or, if you have some shrimp handy, quickly sauté them separately and fold them in too. It instantly turns this standard **rice pilaf with chicken broth** into a hearty entrée!
If you have other questions after reading through all the steps, please drop me a line! I love helping cooks become confident. You can always find more tips and tricks over on my gourmet side dishes fast page if you’re looking to level up other recipes!
Nutritional Estimates for This Rice Pilaf Recipe
Now, I’ll be the first to tell you I’m a cook, not a nutritionist! I focus on flavor and getting that beautiful, fluffy texture in under 30 minutes, which, honestly, is a win in my book. But I know some of you like to keep track of what’s in your food. So, based on the standard ingredients listed for four servings, here are the general estimates I pulled together. Take these as a ballpark figure, because what you swap out (like using beef consommé instead of chicken broth) will definitely change the numbers a bit!
- Serving Size: 1 cup cooked
- Calories: About 280
- Fat: 6g
- Carbohydrates: 50g
- Protein: 6g
- Sodium: 450mg (This can change a lot depending on how salty your broth is, so taste before you add extra salt!)*
Remember, these numbers apply to one serving of the base pilaf. If you load it up with those awesome toasted almonds or dried cranberries we talked about, you’ll need to adjust things up a bit. When I’m making this as a savory rice side dish for a big family dinner, I try to keep the broth low-sodium just to keep that salt number reasonable.
Share Your Rice Pilaf Recipe Success
Seriously, I want to hear about this! Don’t keep this incredible, fluffy rice masterpiece to yourself. You’ve mastered the toasting, you nailed the resting period, and now you have the **best rice pilaf** in your rotation. Did you try the orzo trick? Did you sneak in some almonds? Tell me everything!
The real joy of Kitchen Slang is seeing you all translate these professional tricks into your own kitchens. Please, take a moment to leave a comment below. Tell me how long it really took you to make this **pilaf recipe under 30 minutes** and if your family noticed the difference!
If you snap a picture of your beautiful **aromatic rice recipe**, tag me! Knowing that this simple technique helps you bring confident, delicious food to your table is why I do this. And if you ever have any trouble or just want to share a new idea, you can always get in touch with me via the contact page. Happy cooking, friends!
PrintThe Ultimate Fluffy & Flavorful Rice Pilaf Recipe (Ready in Under 30 Minutes)

Make light, fluffy, and aromatic rice pilaf using simple techniques. This easy recipe uses sautéed onions, garlic, and chicken broth for maximum flavor, making it a perfect quick side dish for any meal.
- Prep Time: 10 min
- Cook Time: 25 min
- Total Time: 35 min
- Yield: 4 servings 1x
- Category: Side Dish
- Method: Stovetop
- Cuisine: American
- Diet: Vegetarian
Ingredients
- 1 tablespoon butter
- 1 tablespoon olive oil
- 1/2 cup orzo pasta (optional, for texture)
- 1 small yellow onion, finely chopped
- 2 cloves garlic, minced
- 1 1/2 cups long-grain white rice (like Basmati or converted rice)
- 2 1/4 cups chicken broth (or vegetable broth)
- 1/2 teaspoon salt
- 1/4 teaspoon black pepper
- 1/4 cup fresh parsley, chopped (for garnish)
Instructions
- Heat the butter and olive oil in a medium saucepan over medium heat.
- Add the orzo pasta, if using, and cook, stirring constantly, until it turns light golden brown. This step builds flavor.
- Add the chopped onion to the saucepan. Cook until the onion softens, about 4 minutes.
- Add the minced garlic and cook for 1 minute more until fragrant. Do not let the garlic burn.
- Add the long-grain rice to the pan. Stir and toast the rice with the onions and butter for 2 to 3 minutes until the edges of the grains look slightly translucent.
- Pour in the chicken broth, salt, and pepper. Bring the mixture to a boil.
- Once boiling, immediately reduce the heat to the lowest setting, cover the saucepan tightly with a lid, and simmer for 15 minutes without lifting the lid.
- Remove the saucepan from the heat and let it stand, covered, for an additional 10 minutes. This allows the rice to steam and become fluffy.
- Remove the lid, fluff the rice gently with a fork, and stir in the fresh parsley before serving.
Notes
- For a richer flavor, use beef consommé instead of chicken broth.
- To customize this savory rice side dish, stir in 1/2 cup of toasted slivered almonds or dried cranberries after fluffing the rice.
- Rinsing the rice before toasting is optional; toasting is the key step for fluffy rice pilaf.
Nutrition
- Serving Size: 1 cup cooked
- Calories: 280
- Sugar: 1
- Sodium: 450
- Fat: 6
- Saturated Fat: 2
- Unsaturated Fat: 4
- Trans Fat: 0
- Carbohydrates: 50
- Fiber: 2
- Protein: 6
- Cholesterol: 5