
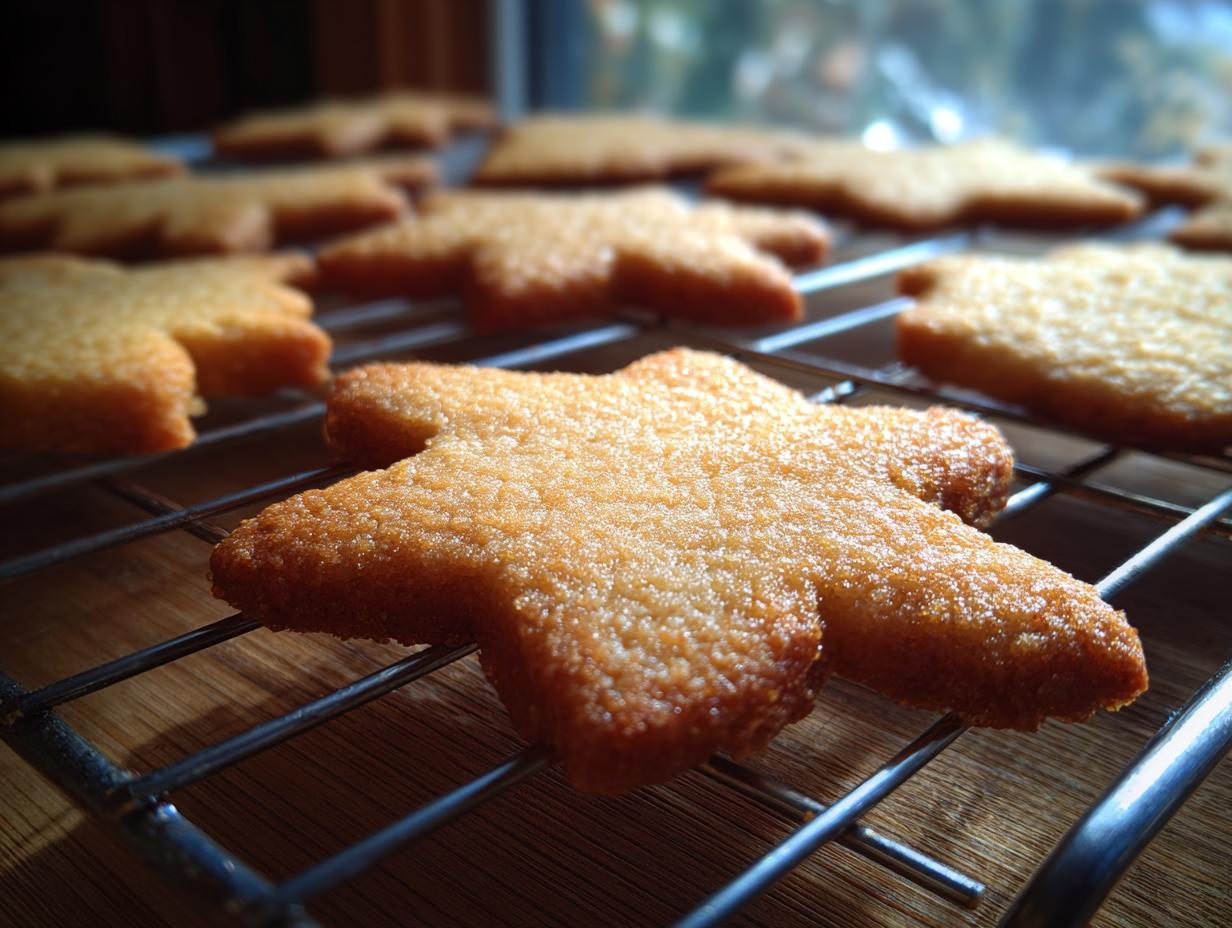
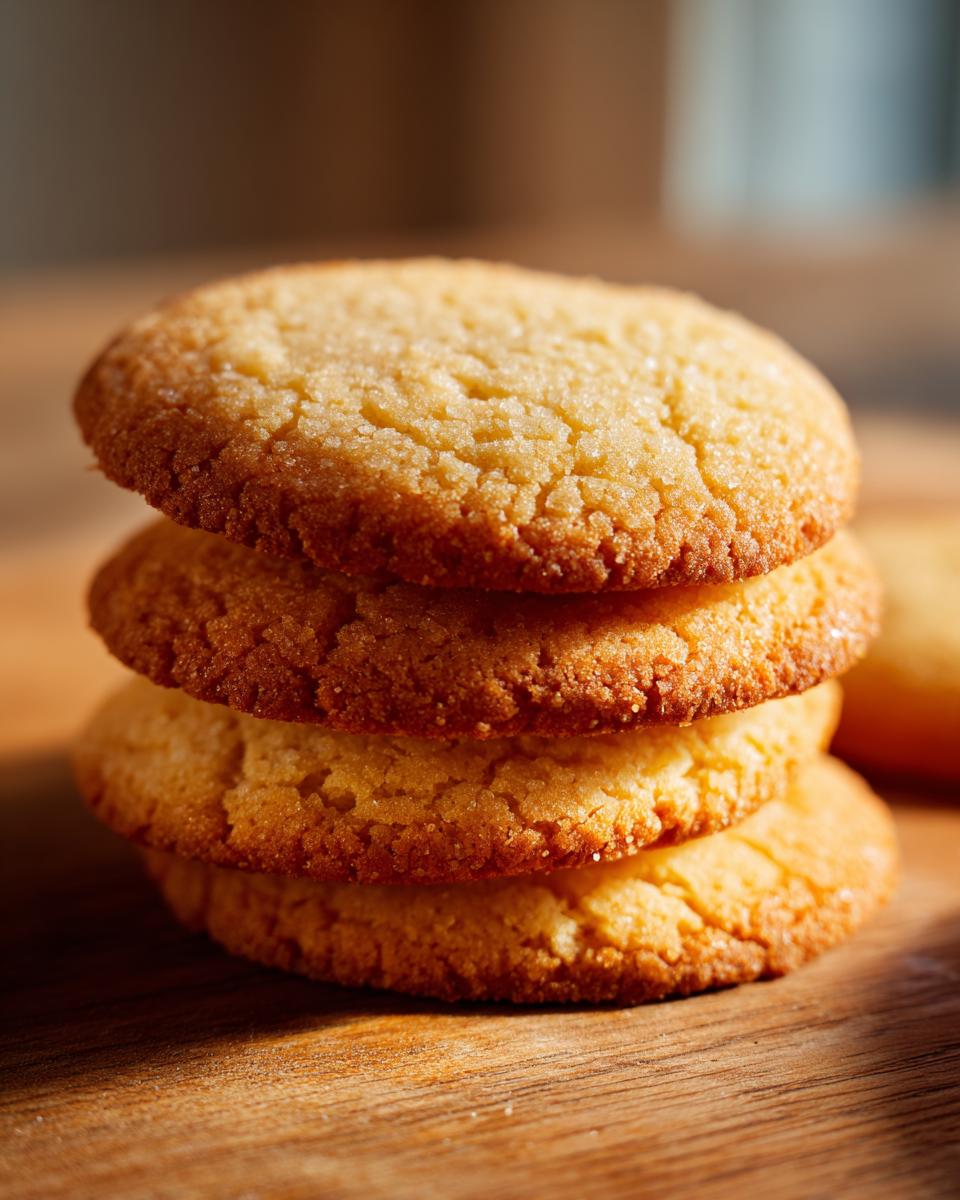
Oh, the sheer joy of rolling out dough and cutting out perfect little shapes! If you’re anything like me, there’s just *something* magical about turning simple ingredients into edible art. That’s precisely why I’m so thrilled to share my go-to recipe for perfect sugar cookies. These aren’t just any cookies; they’re the kind that hold their shape beautifully, letting your imagination run wild with frosting and sprinkles. Seriously, imagine pulling these gorgeous, buttery cut-outs straight from the oven, ready to become little masterpieces for any holiday or celebration. It takes me right back to my grandma’s kitchen, the air thick with that sweet, comforting aroma.
- Why You'll Love These Sugar Cookies
- The Perfect Cut-Out Sugar Cookie Dough
- How to Make Sugar Cookies That Hold Their Shape
- Decorating Your Beautiful Sugar Cookies
- Tips for Success with Sugar Cookies
- Storage and Reheating Sugar Cookies
- Frequently Asked Questions About Sugar Cookies
- Nutritional Information
- Share Your Beautiful Sugar Cookies!
Why You’ll Love These Sugar Cookies
Trust me, these sugar cookies are a total game-changer for anyone who loves to bake and decorate. They hit all the right notes, and you’re going to adore them!
- They Actually Hold Their Shape! This is the big one, right? No more sad, spread-out blobs when you pull them out of the oven. Your intricate shapes will look just as sharp as when you cut them.
- Super Easy to Make: The dough comes together in a snap, and the steps are straightforward. Even if you’re new to baking cut-out cookies, you’ll nail this.
- Butter, Butter, Butter! You can truly taste the quality. They have that perfect, rich, buttery flavor that makes you want to grab another one (or five!).
- Decorating Dream: Whether you’re piping fancy royal icing or just going wild with sprinkles, this smooth surface is your canvas for creating edible art.
- Total Crowd-Pleaser: From holidays to birthdays to just because, these beautiful decorated cookies are always a hit. They just radiate joy!
The Perfect Cut-Out Sugar Cookie Dough
Alright, let’s talk about the magic behind these amazing sugar cookies! It all comes down to the dough, my friends. We want something that’s sturdy enough to handle all that rolling and cutting without getting sad and floppy, but still tender and buttery. I’ve tinkered with this recipe a bunch, and I think I’ve finally landed on the perfect balance. It’s all about the ingredients and how they play together. That bit of baking powder gives just a *hint* of lift so they aren’t too dense, and the right ratio of flour to fat is crucial for that perfect texture that holds its shape beautifully.
Ingredients for Perfect Sugar Cookies
Here’s what you’ll need to make this amazing dough. Make sure your butter and egg are at room temp—it really makes a difference!
- 1 cup unsalted butter, softened
- 1 cup granulated sugar
- 1 large egg
- 1 teaspoon vanilla extract
- 2 1/2 cups all-purpose flour
- 1 teaspoon baking powder
- 1/2 teaspoon salt
Essential Equipment for Sugar Cookies
Having the right tools makes the whole process so much smoother. You’ll want:
- A big mixing bowl
- A whisk or sifter for your dry ingredients
- A stand mixer with a paddle attachment or a hand mixer
- A rolling pin (your trusty friend!)
- Various cookie cutters in your favorite shapes
- A baking sheet or two
- Parchment paper (a lifesaver for clean-up!)
- A spatula or offset spatula for moving cookies
How to Make Sugar Cookies That Hold Their Shape
Okay, this is where the magic really happens for those beautiful sugar cookies! Getting that perfect shape that doesn’t spread is key, and it all comes down to a few simple tricks. Getting the dough just right is your secret weapon for cookies that hold their shape like a dream. Trust me, following these steps closely will give you those crisp edges and perfect little designs you’re after.
Preparing the Cut-Out Cookie Dough
First things first, let’s get this dough whipped up! In a big bowl, or the bowl of your stand mixer, cream together that softened butter and granulated sugar. You want it to get nice and light and fluffy – think pale yellow and airy. This takes a few minutes, but it’s so worth it! Then, beat in your egg and that yummy vanilla extract until everything is well combined.
Now, in a separate bowl, whisk together your flour, baking powder, and salt. This makes sure everything’s evenly distributed. Gradually add these dry ingredients to your wet ingredients, mixing on low speed (or with a spoon!) until it *just* comes together. Seriously, don’t overmix! Overmixing can make your cookies tough, and we want tender perfection here. Then, divide the dough in half, flatten each half into a disc like you’re making little frisbees, wrap ’em up tight in plastic wrap, and into the fridge they go for at least an hour. This chilling step is super crucial for your cut-out cookie dough; it firms up the butter, which is what helps prevent spreading!
Rolling and Cutting Your Sugar Cookies
Once the dough is nice and chilly, it’s time to roll! Lightly flour your surface – I like to use a bit of flour on my rolling pin too. Roll out one disc of dough to about 1/4-inch thickness. Try to keep it even all the way across; that’s key for baking evenly. Now for the fun part: grab your favorite cookie cutters and go to town! If the dough starts to feel too soft or sticky while you’re cutting, just pop it back in the fridge for 10-15 minutes. It makes such a difference!
Baking Your Perfectly Shaped Sugar Cookies
Preheat your oven to 350°F (175°C) and line your baking sheets with parchment paper – makes cleanup a breeze and helps prevent sticking. Carefully transfer your perfectly cut-out shapes onto the prepared baking sheets. I like to give them a little space, maybe an inch or so apart. Now, bake them for about 8-10 minutes. You’re looking for the edges to be just barely golden. They’ll continue to firm up as they cool. Overbaking is the enemy of soft sugar cookies, so watch them closely! Let them cool on the baking sheet for a couple of minutes before gently transferring them to a wire rack to cool completely. This is super important before you even *think* about decorating them!
Decorating Your Beautiful Sugar Cookies
Okay, now that you’ve got these perfect, perfectly shaped sugar cookies cooled, it’s time for the *real* fun – making them into little works of art! This is where all those sharp edges and nice flat surfaces pay off big time. You can create anything you can dream up, from elegant designs to super playful patterns. The goal is those gorgeous, decorated cookies that just scream celebration!
Simple Icing for Sugar Cookies
For the best icing for sugar cookies, you really can’t beat a good royal icing. It dries hard and holds its shape beautifully, which is exactly what we need for detailed work. You can whip up a basic batch by beating together some powdered sugar, a little bit of meringue powder (this acts like egg whites but is super stable!), and just enough water or milk until you get a smooth, thick-but-still-pourable consistency. If it’s too thick, add a tiny splash of liquid; too thin? More powdered sugar! It should flow smoothly off your whisk but hold its peaks for a few seconds. It takes a little practice to get it just right, but trust me, it’s worth it for those sharp lines!
Tips for Creative Sugar Cookie Designs
Here’s where you can really let your creativity shine! Don’t be afraid to play around. For basic flooding, use a slightly thinner icing and a squeeze bottle or a piping bag with a small round tip to fill in the shapes. For borders and details, use a thicker icing consistency and a finer tip. And sprinkles? Oh, sprinkles are your best friend! Load them up while the icing is still wet for maximum stickage. You can also use edible glitter for a little sparkle, create marble effects by swirling two colors together, or even try stenciling with a bit of powdered sugar once the icing is dry. The possibilities are truly endless, and each cookie becomes a special little treat!
Tips for Success with Sugar Cookies
Alright, my friends, let’s chat about making these sugar cookies absolutely perfect, every single time! I’ve learned a thing or two over the years, and a few little tricks can make a huge difference in getting those crisp edges and that lovely, buttery flavor. You want your cookies to look as good as they taste, right? So, here are my top tips to ensure your baking adventure is a smashing success!
Don’t Skip the Chill Time
I know, I know, you’re excited to bake! But seriously, that chilling step for the dough? It’s non-negotiable if you want cookies that hold their shape. Cold dough is easier to roll, easier to cut, and it spreads way less in the oven. If you’re short on time, just chill it longer. It really is that important!
Roll Evenly for Even Baking
Try your best to roll the dough to a consistent thickness, about 1/4-inch is perfect. If some spots are thicker than others, they’ll bake at different rates. You want all your beautifully cut sugar cookies to come out perfectly golden and ready for decorating at the same time.
Watch Your Oven!
Ovens can be finicky, can’t they? Keep an eye on your cookies during the last few minutes of baking. They go from perfectly golden to slightly overdone super fast! You’re looking for that *very* light golden edge. They’ll continue to bake a bit on the hot pan after you take them out, so pull them just before they look totally done.
Cool Completely Before Decorating
This is a big one for decorating! Trying to ice warm cookies is a recipe for a melty, colorful mess. Let them cool completely on a wire rack. Patience, my friend! Once they’re totally cool, your icing will dry beautifully and you’ll have those crisp lines.
Storage and Reheating Sugar Cookies
Now that you’ve got a beautiful batch of sugar cookies, keeping them fresh is key! For undecorated cookies, just pop them into an airtight container. They’ll stay perfectly soft and delicious for up to a week at room temperature. If they’re decorated with royal icing, storing them in a single layer is best so the decorations don’t get smushed. If you *really* need to reheat one (though I doubt you will!), a few seconds in the microwave can crisp them up a tad, but honestly, they’re best enjoyed at room temp!
Frequently Asked Questions About Sugar Cookies
Got questions about these perfect sugar cookies? I’ve got answers! Baking should be fun, not frustrating, so let’s clear up any little hiccups you might run into.
Why do my sugar cookies spread out so much?
Oh, the dreaded spread! Usually, it’s because the butter was too soft when you mixed it, or maybe the oven wasn’t quite hot enough. Making sure your butter is just *softened* (not melty!) and chilling the dough until it’s really firm before baking are the biggest helps. Also, don’t over-cream the butter and sugar; you want it light and fluffy, but not so much that it incorporates *too* much air, which can also cause spreading. For truly perfect cut-out cookie dough, a good chill is your best friend!
Can I make this sugar cookie dough ahead of time?
Absolutely! That’s one of the best things about this recipe. You can totally make the dough, wrap it well in plastic wrap, and keep it in the fridge for up to 3 days. When you’re ready to bake, just let it sit on the counter for about 15-20 minutes to become a little more pliable before rolling. It actually makes the dough easier to handle!
What’s the best way to store decorated sugar cookies?
Once your beautiful sugar cookies are completely decorated and the icing for sugar cookies has dried hard (this is super important!), store them in an airtight container. Try to store them in a single layer if you can, so the decorations don’t get smudged. They’ll stay lovely and fresh at room temperature for about a week. Avoid putting them in the fridge, as that can sometimes make the icing a bit sticky.
Can I use margarine instead of butter?
While you *can* technically use margarine, I really, really recommend sticking with real butter for these. Butter has a higher fat content and a flavor that just can’t be beat. Margarine often contains more water, which can lead to your cookies spreading more. You’ll get the best texture and flavor by using good old unsalted butter!
Nutritional Information
Now, about the numbers! These are just estimates, of course, since everyone’s baking can be a little different. But you can get a good idea of what’s in each of these yummy sugar cookies:
- Serving Size: 1 cookie
- Calories: 150
- Fat: 7g
- Protein: 2g
- Carbohydrates: 20g
- Sugar: 10g
- Sodium: 50mg
Share Your Beautiful Sugar Cookies!
Alright, bakers, I’d be SO thrilled to hear all about your cookie adventures! Did you make these sugar cookies? How did they turn out? Tell me all about your decorating triumphs in the comments below, I can’t wait to see your creations! You can also learn more about our passion for simple, delicious recipes on our About Page!
PrintPerfect Cut-Out Sugar Cookies
Bake beautiful, buttery sugar cookies that hold their shape for decorating. This recipe provides a reliable dough for all your holiday and celebration cookie needs.
- Prep Time: 20 min
- Cook Time: 10 min
- Total Time: 1 hour 30 min
- Yield: 24 cookies 1x
- Category: Dessert
- Method: Baking
- Cuisine: American
- Diet: Vegetarian
Ingredients
- 1 cup unsalted butter, softened
- 1 cup granulated sugar
- 1 large egg
- 1 teaspoon vanilla extract
- 2 1/2 cups all-purpose flour
- 1 teaspoon baking powder
- 1/2 teaspoon salt
Instructions
- Cream together the softened butter and granulated sugar in a large bowl until light and fluffy.
- Beat in the egg and vanilla extract until well combined.
- In a separate bowl, whisk together the flour, baking powder, and salt.
- Gradually add the dry ingredients to the wet ingredients, mixing until just combined. Do not overmix.
- Divide the dough in half, flatten each half into a disc, wrap in plastic wrap, and refrigerate for at least 1 hour.
- Preheat your oven to 350°F (175°C). Line baking sheets with parchment paper.
- On a lightly floured surface, roll out one disc of dough to about 1/4-inch thickness.
- Cut out shapes using cookie cutters.
- Carefully transfer the cut-out cookies to the prepared baking sheets.
- Bake for 8-10 minutes, or until the edges are lightly golden.
- Let the cookies cool on the baking sheets for a few minutes before transferring them to a wire rack to cool completely.
Notes
- For best results when cutting shapes, chill the dough until firm.
- If your dough becomes too soft while cutting, return it to the refrigerator for a few minutes.
- Decorate with your favorite royal icing and sprinkles once the cookies are completely cool.
Nutrition
- Serving Size: 1 cookie
- Calories: 150
- Sugar: 10g
- Sodium: 50mg
- Fat: 7g
- Saturated Fat: 4g
- Unsaturated Fat: 3g
- Trans Fat: 0g
- Carbohydrates: 20g
- Fiber: 1g
- Protein: 2g
- Cholesterol: 25mg