
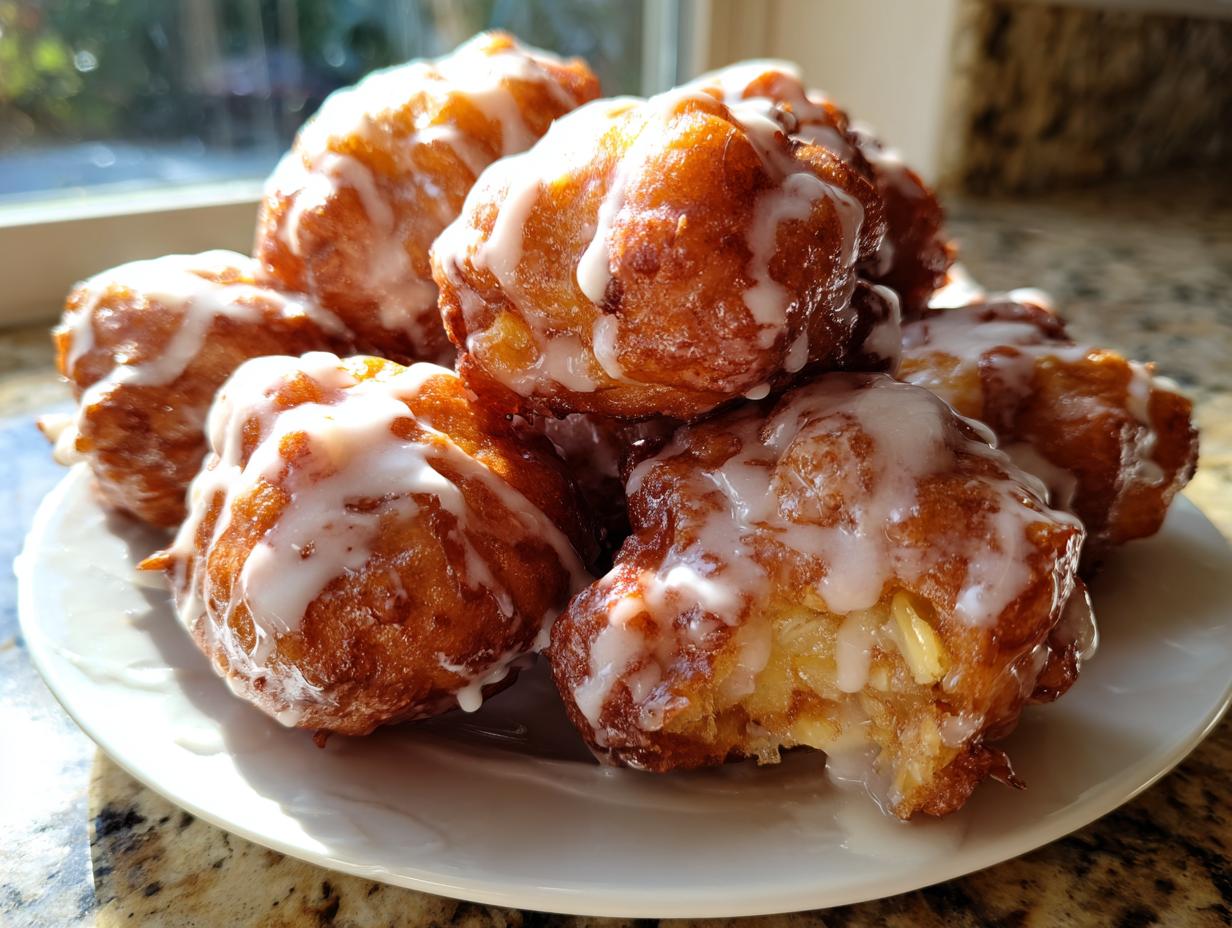
You know that smell? That warm, sweet cloud that just screams, “It’s officially cozy season!”? That’s the language of comfort food, and nothing speaks it louder than a perfect, golden-brown apple fritter. Too many recipes out there try to sell you on a quick fix, but they end up with soggy centers or dry crumbs. Not here. My goal is to translate the tricks I picked up in busy kitchens—the real-talk secrets—so you absolutely nail that bakery-style contrast: shatteringly crispy edges hugging a totally tender, soft interior. Forget feeling intimidated; we’re making show-stopping apple fritters right on your home countertop today.
- The Kitchen Slang Secrets to the Best Apple Fritter Recipe
- How to Prepare Crispy Apple Fritters: Step-by-Step Instructions
- Mastering the Vanilla Glaze for Glazed Apple Fritters
- Tips for Success with Your Homemade Apple Fritter Recipe
- Variations on the Classic Apple Fritter
- Serving Suggestions for Your Tender Apple Fritters
- Storage and Reheating Instructions for Apple Fritters
- Frequently Asked Questions About Apple Fritters
- Nutritional Estimates for One Apple Fritter
The Kitchen Slang Secrets to the Best Apple Fritter Recipe
When you’re aiming for an authentic, bakery-style apple fritter, it’s less about the frying and more about what happens before the batter hits the oil. Professional bakers know that the structure is everything. We want a batter that’s sturdy enough to hold those apple chunks but weak enough not to become heavy cake when it hits the heat. The secret weapon here is keeping the wet and dry components just barely acquainted. You mix them until you see flour streaks—that is the line between a tender apple fritter and a tough, chewy disc.
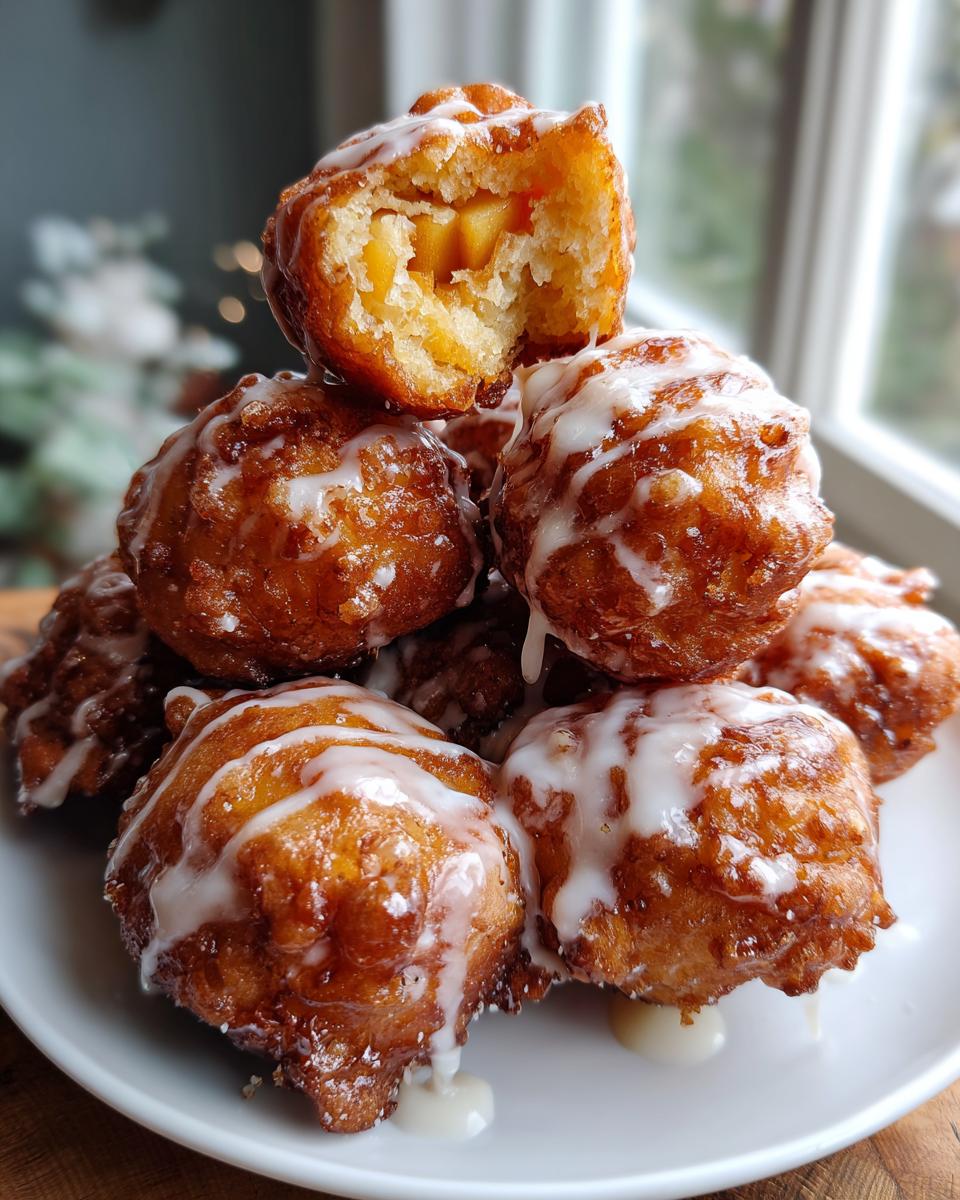
Also, pay attention to the apples. If you use mushy, mealy apples, they’ll just dissolve into mush in the oil. I always reach for Granny Smith, or something similarly firm and tart. They hold onto their shape during the fry, giving you those beautiful pockets of cooked fruit that make every bite an experience. You’re building texture here, people, and those little textural contrasts are what separate a good sweet apple snack from one you dream about!
Essential Ingredients for Perfect Apple Fritters
Here is what you need lined up before you even think about heating the oil. Remember, for the crispiest apple fritters, have everything measured and ready—this goes fast!
- 2 cups all-purpose flour
- 1/4 cup granulated sugar (for the batter)
- 2 teaspoons baking powder (This delivers the lift!)
- 1 teaspoon ground cinnamon
- 1/2 teaspoon salt
- 1/2 cup milk
- 2 large eggs
- 1 cup finely diced apples (About two medium, tart apples, like Granny Smith)
- 1 teaspoon vanilla extract (for the batter)
- Vegetable oil, enough for deep frying (We are going authentic here!)
- 1 cup powdered sugar (for the final glaze)
- 2 tablespoons milk (for the glaze)
- 1/2 teaspoon vanilla extract (for the glaze)
If you want to see how the deep-fried method compares to mixing a quick homemade apple fritter dough from scratch, check out my thoughts on handling different batters over at homemade fried donut recipes when you have a moment!
How to Prepare Crispy Apple Fritters: Step-by-Step Instructions
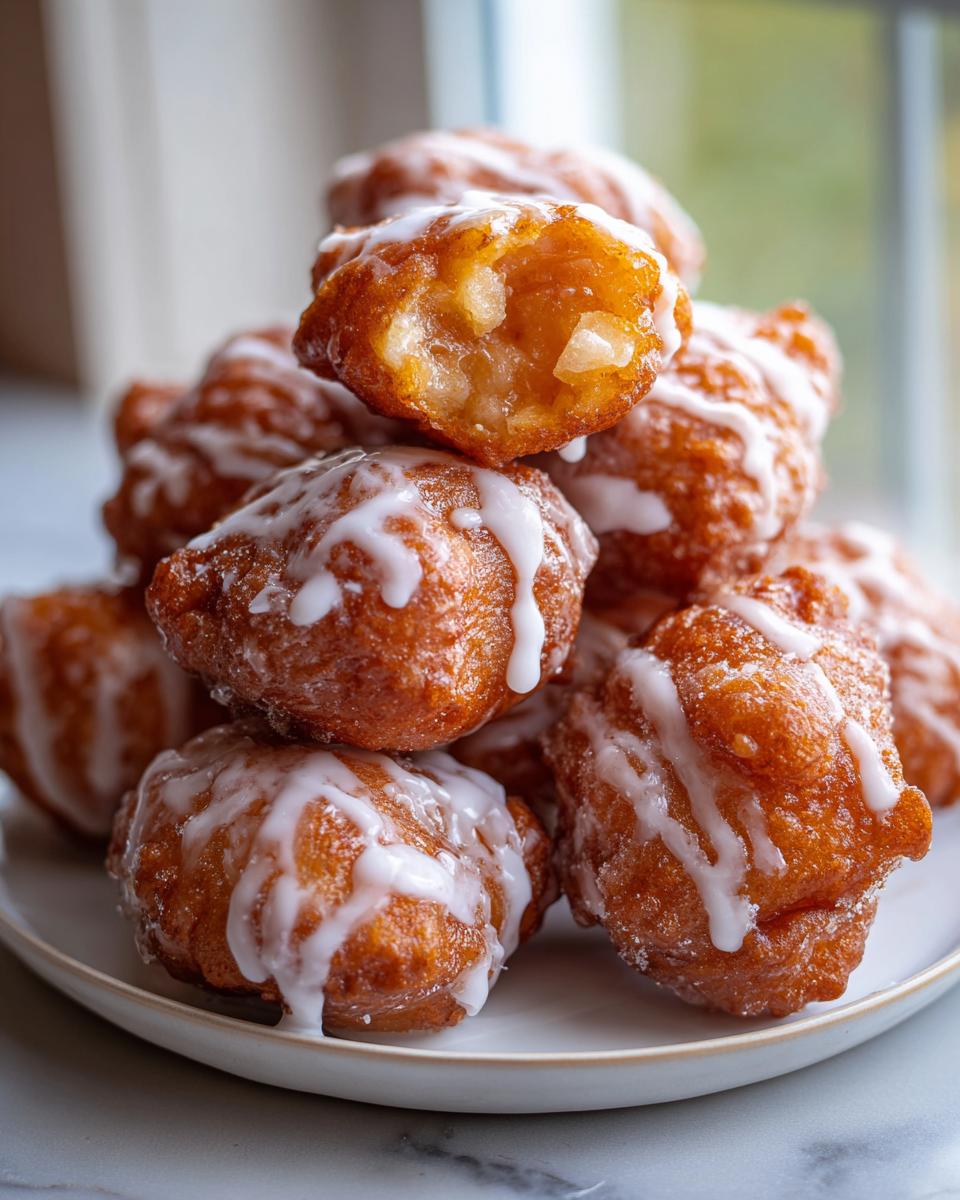
Alright, time to get down to business! If your ingredients are lined up, this process moves *fast*. Remember, getting that perfect, mouthwatering texture for your apple fritter takes focus for about 15 minutes of hands-on time, and then another 15 minutes of frying. We are aiming for that sweet spot where the outside crackles when you bite in, but the inside is still soft enough to melt. Don’t rush the temperature step, though—that’s what separates the bakery results from the greasy diner ones.
Mixing the Apple Fritter Batter Correctly
This is where most people get tripped up! I learned this the hard way back when I was first working in the brunch rush; overmixing batter turns everything rubbery, instantly preventing that tender apple fritter we crave. When you combine your wet items into your already whisked dry ingredients, just stir until the flour mostly disappears. I mean it—a few white lumps are totally fine, even encouraged! Those little pockets of unmixed flour will turn into that beautiful, airy interior once they hit the heat. Stop mixing when you can still see streaks of dry flour hanging around.
Now, gently fold in your finely diced apples. Treat that batter nicely! Once the apples are distributed, you are done. Don’t go back in to stir it again, or we’re going to have tough fried cakes instead of light fritters.
Frying Technique for Golden Apple Fritters
You absolutely must have a good thermometer here. This is non-negotiable for achieving those crispy apple fritters. Heat 2 to 3 inches of oil in a heavy pot until it hits a steady 350 degrees Fahrenheit. If you drop the batter in and the oil immediately cools down, those fritters are going to soak up grease like a sponge! We want a quick, intense fry.
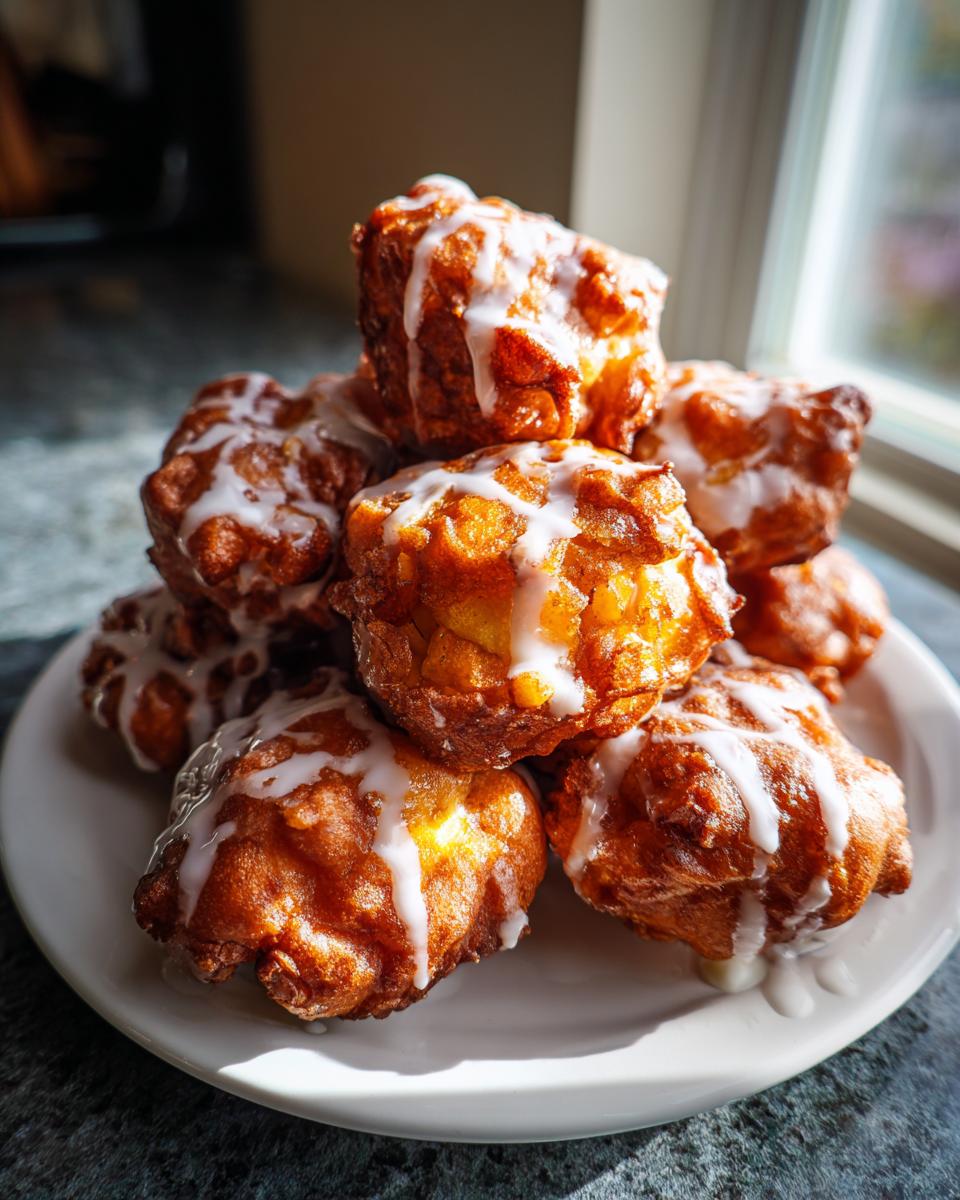
Carefully drop about two tablespoons of batter into the hot oil—make sure there are apples in it! Don’t crowd the pot; fry only about 3 or 4 at a time. They need space to float and bubble up properly. They look beautifully golden brown on the bottom, then flip them. Cook the second side for another 2 or 3 minutes until they’re uniformly colored. Scoop them out onto paper towels to drain. If you mess around with your oil too much while frying, you might end up with something better suited for a crumble, so keep that temperature ironclad! Speaking of delicious apple desserts, I have a fantastic easy apple crumble recipe that is virtually foolproof. And if you’re looking for how to handle a full pie crust without the stress, check out my tips for a classic homemade flaky crust!

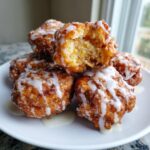
Mastering the Vanilla Glaze for Glazed Apple Fritters
The vanilla glaze is the final, non-negotiable hug for these apple fritters. We want glaze, not icing—something thin enough to run appealingly down the sides when they’re warm, but thick enough that you know it’s there. The key to getting this right every time is patience when adding the milk.
Start by whisking that powdered sugar and vanilla extract together. It will look like cement—don’t panic! Now, this is where the slang comes in: add the milk just a single drop at a time. Seriously, use a little spoon or the tip of a knife to add the liquid, whisking hard after every single addition. You’re looking for a consistency that drips slowly off your whisk in a thick ribbon. If you accidentally add too much and it gets too thin, I always have a secret weapon nearby: a little extra powdered sugar to thicken it back up.
If you love rich drizzles, you might also want to explore how to make a fantastic easy homemade salted caramel sauce to swap out for this glaze next time. But for these incredible apple fritters, that simple vanilla drizzle is perfection.
Tips for Success with Your Homemade Apple Fritter Recipe
Look, I love giving you the recipe, but what truly separates folks who nail an amazing experience from those who end up with a sad, oily mess is knowing the troubleshooting language. This is the stuff I watched the line cooks fight over—the little details that make all the difference when you’re aiming for true bakery-style perfection in your apple dapple cake, or in this case, your fritters.
My number one, non-negotiable rule for perfect **apple fritters**? You must control your heat. Honestly, you need a thermometer for this. If your oil is wandering below 350°F while you fry, those beauties are just going to sit there, drinking oil, and getting greasy inside. You want that satisfying sizzle when the batter hits the surface—that means the crust is setting instantly, trapping the fluffiness inside. Keep that temperature steady!
Second piece of slang advice: Use firm, tart apples. Those softer varieties just break down during the fry. You want apples that offer some resistance when you bite into them, so you get that lovely two-part texture: crispy dough, slightly firm cooked apple. If you want to get really fancy, try dusting them with a little cinnamon sugar right after they come out of the oil, *before* the heavy glaze goes on. That extra cinnamon hit really lifts the whole flavor profile up!
Variations on the Classic Apple Fritter
Now, listen, while this deep-fried, vanilla-glazed masterpiece is my absolute go-to for that authentic, heavy-hitting, comfort-food hit—it’s not the only way to enjoy apples and fried dough! Sometimes you need a lighter touch, or maybe you just ran out of deep-frying oil (which happens to the best of us!). That’s when we pull out the flavor modifications for this base recipe.
For your next batch of these incredible **apple fritters**, try swapping out some of that cinnamon for other warming spices. A quarter teaspoon of ground nutmeg mixed into the dry ingredients, for example, gives it a richer, almost autumnal depth. Or maybe you’re craving nuts? Toss in about a half-cup of roughly chopped pecans or walnuts along with your apples. Toasting them quickly in a dry pan beforehand really brings out their natural oils—that’s great kitchen slang for boosting flavor!
I know a lot of folks are looking for ways to skip the fryer altogether. And I hear you! While I’m sticking to the classics here today, I totally have recipes dedicated to making apple snickerdoodle dump cake styles or even baked versions if you’re trying to keep things lighter. But trust me, for sheer, unfiltered joy, nothing beats the deep-fried crunch. If you try adding some orange zest to the batter, let me know what you think—that’s my favorite little summer twist on the traditional fall dessert recipes!
Serving Suggestions for Your Tender Apple Fritters
Okay, you’ve got these golden, gooey, decadent apple fritters staring back at you, dripping with that vanilla glaze. Fantastic! But now what? Since these are rich, honest-to-goodness fried treats, sometimes you need something to cut through that deliciousness, or maybe you want to turn them from a sweet snack into a full, cozy breakfast spread.
If you’re serving these up for breakfast—and what a grand idea that is!—you don’t want to weigh everyone down before noon. I always pair them with something bright and slightly acidic to balance out the fried richness. Think about serving two small fritters alongside some plain Greek yogurt topped with a handful of fresh berries. The tang of the yogurt is the perfect counterpoint to the cinnamon sugar and vanilla sweetness. It is honestly such a great way to enjoy these cozy breakfast sweets without feeling like you should immediately take a nap!
For dessert, you have real options. If you want to lean into the decadence, go for broke! A scoop of good vanilla bean ice cream melting right next to a warm fritter is pure magic. But if you want something slightly less intense, consider how you might incorporate them into another dish. Have you ever tried taking leftover fritters and crumbling them over a fruit crisp base instead of using straight apples? It gives a fantastic texture! Or, if you’re making a big morning spread, keeping them warm next to something savory, like a simple skillet sausage, makes the whole table feel incredibly welcoming.
And speaking of those amazing morning spreads, if you loved the cinnamon flavor in these fritters, you absolutely have to see my recipe for cinnamon roll casserole. It achieves that same great warm spice factor, but in a completely different, ooey-gooey way!
Storage and Reheating Instructions for Apple Fritters
Listen to me closely on this one: the absolute best apple fritter is the one you eat five minutes after it comes out of the oil, still warm, with the glaze just setting up. That’s the dream! But life happens, and maybe you made a double batch, or you just didn’t want to eat twelve massive **apple fritters** in one sitting. So, how do we save them?
Here is the hard truth from professional kitchens: refrigeration is the enemy of crispiness. When you stash these fluffy, tender apple fritters in the fridge, they lose that incredible exterior texture, and the glaze gets sticky and weird from the condensation. If you’re only storing them for a day, don’t refrigerate them! Just leave them on the counter, covered loosely with a paper towel so they don’t get soggy, but try to eat them within 24 hours. That way, they hold onto most of their integrity.
If you absolutely MUST keep them longer than a day, then yes, airtight container in the fridge is the way to go, but understand you are trading texture for preservation. You’ll need to do some heavy lifting later to bring them back to life.
Best Method for Reheating Crispy Apple Fritters
We are not putting these in the microwave! I repeat, the microwave turns a beautifully fried apple fritter into a sad, steaming sponge. We need *dry* heat to coax that crispness back. If you only have one or two to reheat, the toaster oven is your absolute best friend. Set it to about 350 degrees for maybe 3 to 5 minutes. Keep a close eye on them; we just want them warm through, not cooked further.
If you’re reviving a whole batch, use your regular oven. Place the fritters directly on a wire rack set over a baking sheet. This allows air to circulate underneath them, which is crucial for drying out the surface a little and bringing back that satisfying exterior crunch. Heat the oven to 350°F and let them warm up for about 5 to 7 minutes. They won’t be *exactly* as they were fresh from the fryer, but they will be a million times better than microwaved ones. Trust me on the re-crisping!
If you happen to have some leftover apples lying around that didn’t make it into the fritter batter, maybe try making an easy apple dip recipe instead of frying! It sounds like a nice little palate cleanser for the next day.
Frequently Asked Questions About Apple Fritters
Can I make this Homemade Apple Fritter Recipe ahead of time?
You absolutely can, but here’s the kitchen slang trade-off: You should always do the frying part ahead of time, but wait on the glaze! If you fry your **Homemade Apple Fritter Recipe** batch in the afternoon, let them cool completely on a rack. Store them loosely covered at room temperature overnight. If you try to glaze them ahead of time, the glaze gets tacky, absorbs into the dough overnight, and honestly looks pretty sad by morning. Fry them when you can, and then just whip up that vanilla glaze fresh right before you plan to serve them!
What is the secret to truly Crispy Apple Fritters?
If you want those perfect, shatter-crisp edges on your **Crispy Apple Fritters**, there are two things you absolutely cannot skip. First, temperature control: your oil has to register a solid 350°F before the batter goes in, and stay there. If you are frying twelve of these things, you might need to nudge the heat up slightly between batches to compensate for the cold batter cooling the oil down. Second, the batter consistency! Remember how I told you not to overmix? That little bit of lumpiness creates air pockets that puff up and crisp when fried. If you mix until it’s smooth as silk, you’re just going to end up with dense donuts, not light fritters!
Are these considered an Easy Apple Fritters recipe for beginners?
Yes! I wouldn’t put something impossible on this site. While deep-frying can feel a little intimidating at first, this is genuinely an **Easy Apple Fritters** recipe once you get the temperature right. The batter is 90% dump-and-stir. The only tricky part is dropping the batter into the hot oil without splashing yourself (careful there!). If you can manage whisking flour and stirring apples, you can master this. It’s all about trusting the recipe and watching your thermometer!
Since you’re thinking about making dinner too, my general guidelines for getting through those tough weeknights without stressing over the stove are over at my guide to easy weeknight dinners—sometimes you just need a win!
Nutritional Estimates for One Apple Fritter
Now, let’s talk about the numbers, because even when we are indulging in the most glorious, mouthwatering apple treats, it’s good to know what we’re working with. Since these are deep-fried apple fritters and they love that sweet vanilla glaze, they aren’t exactly health food, and I’m not going to pretend they are! But knowledge is power, right?
The figures below are rough estimates for one single, generous apple fritter, based on the ingredients listed in the recipe. Keep in mind, the actual amount of oil absorbed during frying—which is the biggest variable—can change these numbers a bit!
- Serving Size: 1 fritter
- Calories: 280
- Sugar: 25g (That glorious glaze adds up!)
- Sodium: 250mg
- Fat: 15g
- Saturated Fat: 4g
- Trans Fat: 0g (Hooray for real butter and oil!)
- Carbohydrates: 35g
- Protein: 4g
I want to be super clear about this: These estimates are what I calculated based on standard pantry ingredients. If you swap whole milk for skim, or if your fritters soak up a little more oil than mine did, your numbers will shift. Use this guide as a general idea of what you’re diving into—a truly comforting and delicious baked-style experience, minus the baking part!
PrintThe Best Classic Deep-Fried Apple Fritters with Vanilla Glaze
Make bakery-style apple fritters at home. This recipe delivers crispy edges and a tender, fluffy interior packed with cinnamon apples, finished with a simple vanilla glaze.
- Prep Time: 15 min
- Cook Time: 15 min
- Total Time: 30 min
- Yield: 12 large fritters 1x
- Category: Dessert
- Method: Deep Frying
- Cuisine: American
- Diet: Vegetarian
Ingredients
- 2 cups all-purpose flour
- 1/4 cup granulated sugar
- 2 teaspoons baking powder
- 1 teaspoon ground cinnamon
- 1/2 teaspoon salt
- 1/2 cup milk
- 2 large eggs
- 1 cup finely diced apples (about 2 medium apples)
- 1 teaspoon vanilla extract
- Vegetable oil, for deep frying
- 1 cup powdered sugar (for glaze)
- 2 tablespoons milk (for glaze)
- 1/2 teaspoon vanilla extract (for glaze)
Instructions
- In a large bowl, whisk together the flour, granulated sugar, baking powder, cinnamon, and salt. This is your dry base.
- In a separate bowl, whisk the milk, eggs, and 1 teaspoon of vanilla extract until combined.
- Pour the wet ingredients into the dry ingredients. Mix gently until just combined. Do not overmix; a few lumps are fine.
- Fold in the diced apples. You want the batter to be thick enough to hold its shape slightly.
- Heat 2 to 3 inches of vegetable oil in a deep, heavy-bottomed pot or Dutch oven to 350 degrees Fahrenheit. Use a thermometer to check the temperature; this step is key for crispy apple fritters.
- Carefully drop spoonfuls of batter (about 2 tablespoons each) into the hot oil, ensuring you get some apple pieces in each drop. Do not crowd the pot.
- Fry for 2 to 3 minutes per side, turning once, until the apple fritters are deep golden brown and cooked through. They should be crispy outside and tender inside.
- Remove the fritters with a slotted spoon and place them on a wire rack lined with paper towels to drain excess oil.
- While the fritters cool slightly, make the glaze: Whisk together the powdered sugar, 2 tablespoons of milk, and 1/2 teaspoon of vanilla extract until smooth. Add more milk, a drop at a time, if the glaze is too thick.
- Dip or drizzle the warm apple fritters generously with the vanilla glaze. Serve immediately for the best mouthwatering apple treats.
Notes
- For the crispiest apple fritters, make sure your oil temperature stays steady at 350°F. If the oil is too cool, the fritters absorb too much oil and become greasy.
- Use firm, tart apples like Granny Smith for the best texture that holds up during frying.
- If you want a stronger cinnamon flavor, dust the cooked fritters lightly with cinnamon sugar before glazing.
Nutrition
- Serving Size: 1 fritter
- Calories: 280
- Sugar: 25g
- Sodium: 250mg
- Fat: 15g
- Saturated Fat: 4g
- Unsaturated Fat: 11g
- Trans Fat: 0g
- Carbohydrates: 35g
- Fiber: 1g
- Protein: 4g
- Cholesterol: 50mg