
You know that heart-sinking moment? You pull your pie out of the oven, and instead of that wonderful, delicate shatter, you get… cardboard? Or worse, a soggy bottom that reminds you of sad, lukewarm dishwater? Yeah, I’ve been there. That’s why I’m thrilled to introduce you to what I call the ultimate game-changer: my foolproof, all-butter pie crust. This isn’t some fussy dough that requires a culinary degree. I learned the tricks used by bistro chefs when translating techniques for real people, and this butter pie crust delivers that guaranteed flakiness every single time. If you like making things like my apple pie cookies, you’ll love this base! Trust me, once you master this simple dough, you’ll never look back. For a truly tender pie shell, check out the wisdom shared by others like this flaky butter pie crust recipe.
- Why This Is the Best butter pie crust Recipe You Will Ever Need
- Ingredients for Your Foolproof butter pie crust
- How to Make Homemade Pie Dough: Step-by-Step butter pie crust Tutorial
- Rolling Out Your Perfect Pie Bottom Crust
- Tips for Success with Your Flaky Pie Crust Recipe
- Making a Double Crust Pie Dough: Next Steps for Your butter pie crust
- Serving Suggestions for Your Sweet and Savory Pie Base
- Storage and Reheating Instructions for Homemade Pie Dough
- Frequently Asked Questions About Making a butter pie crust
- Share Your Perfect butter pie crust Creation
- Share Your Perfect butter pie crust Creation
Why This Is the Best butter pie crust Recipe You Will Ever Need
Okay, so why ditch the store-bought stuff and the recipes that call for adding fat other than butter? Because frankly, nothing beats that deep, rich flavor. This dough is all about pure, unadulterated buttery goodness. I promise you, you won’t find any weird chemical tastes here; it’s just four simple ingredients.
- It’s famously **flaky**. We aim for those shimmering, visible layers that crackle when you cut into them.
- It has zero shortening—just butter. That means bold flavor, period.
- It’s actually easy! Once you know the trick, it comes together faster than you think.
If you’re looking for more simple baking wins, don’t miss my easy apple crumble recipe. For more on achieving that perfect texture, see how they handle their homemade flaky pie crust.
The Secret to a Tender Pie Shell: Temperature Control
This is the biggest translation I pulled from the line cooks: everything must be screaming cold. Your butter needs to be frozen-solid, and your water should have actual ice chunks floating in it. When those cold butter pieces hit the hot oven, the water inside them turns to steam instantly. That steam forces the dough layers apart. If your butter melts early, you just get greasy, tough dough. Keep it together, keep it iced!
Ingredients for Your Foolproof butter pie crust
I love that this recipe is tough on texture but super easy on the shopping list! You only need four things to switch from store-bought misery to absolute flaky perfection. Honestly, if you can keep your ingredients cold, you’ve done 90% of the work already. For more things you can make with just a few things, check out my simple 4 ingredient pie crust post!
Remember, precision matters here, especially with the butter. You’ll need:
Two and a half cups of all-purpose flour, standard stuff. Then, one teaspoon of salt to make all that butter flavor really pop. After that comes the star: one cup, which is two full sticks, of unsalted butter. It absolutely has to be very cold and already cut into small, half-inch cubes—don’t skip the cubing!
Finally, you need the binder, and this has to be ice water. Start with half a cup, but have one or two extra tablespoons ready just in case. If the water isn’t icy, the whole cold-butter performance falls apart before it even gets to the oven. See? Simple, right? It’s all about the quality and temperature of these four items.
How to Make Homemade Pie Dough: Step-by-Step butter pie crust Tutorial
Alright, this is where the magic happens, but let’s keep our breathing steady. We aren’t making a science experiment; we’re making pie. The goal here is fast, cold, and minimal touching. If you’ve ever tried to keep up with the speed of a prep cook while nervously trying to follow a complicated recipe, you know how easy it is to mess this up. Follow these translations, and you’ll be set.
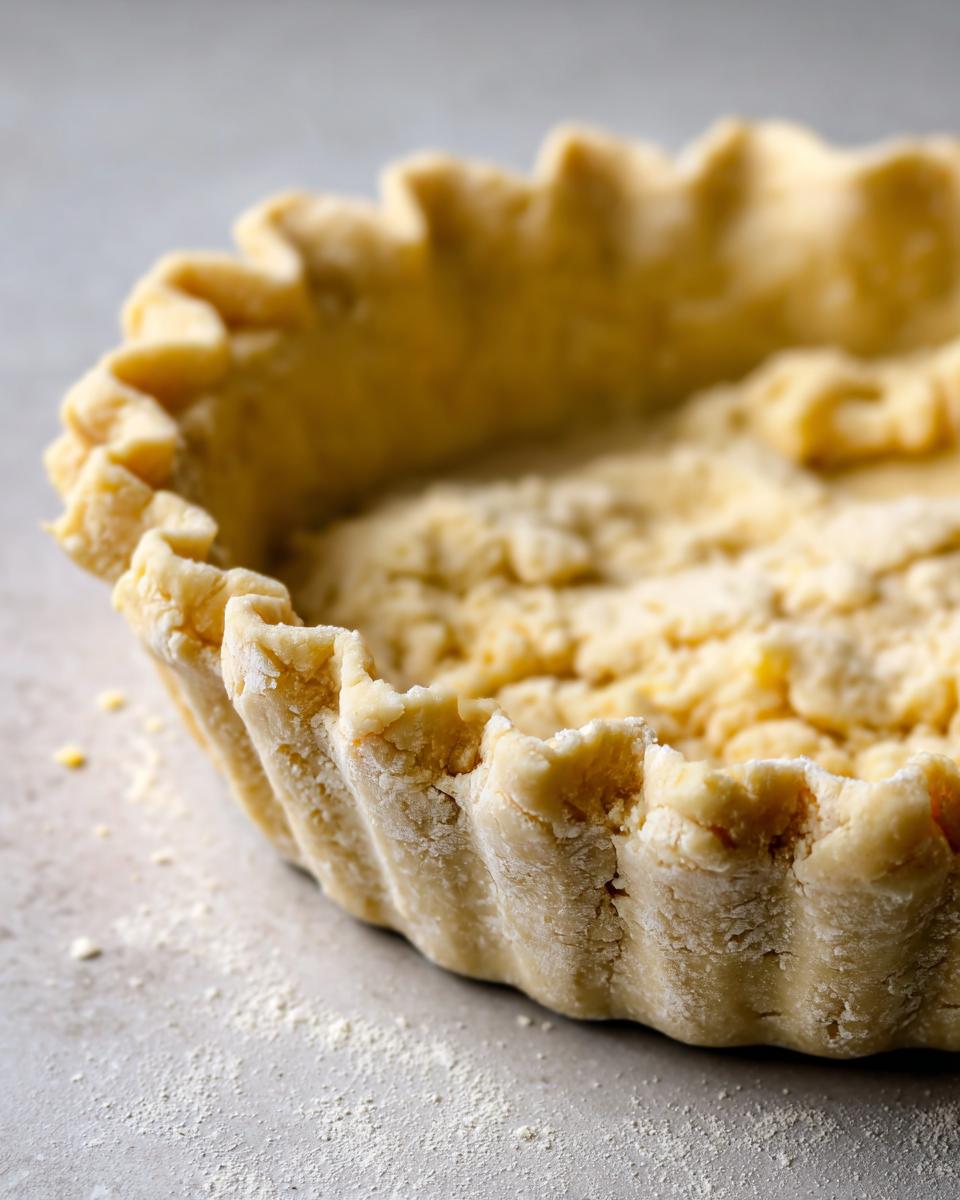
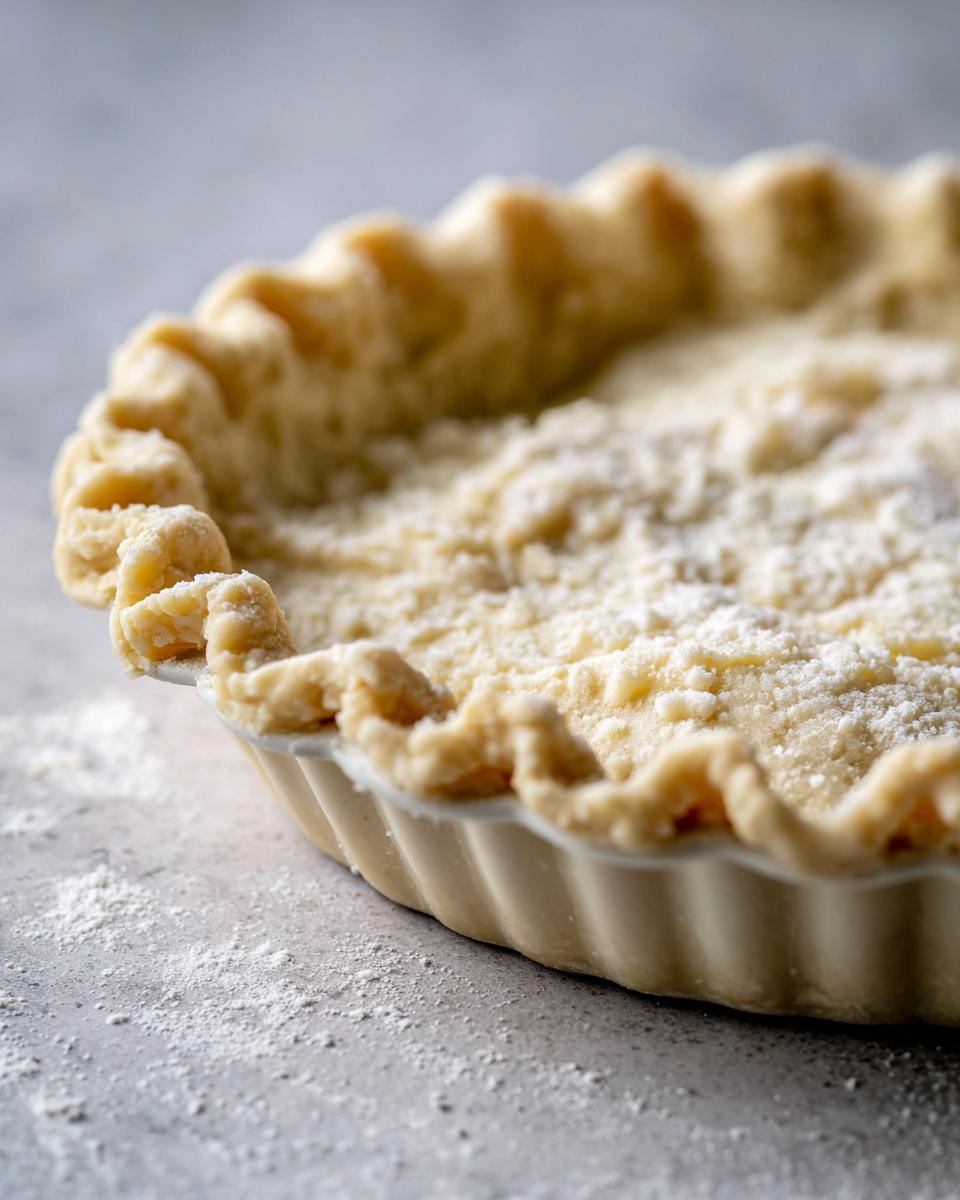
First up, you combine that flour and salt. Simple. Then comes the crucial part: cutting in the butter. You can use a pastry blender—which is great if you want to feel chef-y—or you can just use your hands. If you use your hands, move fast! You want what looks like coarse crumbs, but listen close: some of those butter pieces need to stay visible, about the size of a small pea. Those are your steam pockets, the architects of flakiness!
Next, we add the ice water slowly. I mean it—drizzle it in, toss it lightly with a fork, and keep going until the dough just barely holds together when you squeeze a little bit. Don’t dump it all in! I’ve seen people ruin a whole batch by adding that last splash when it wasn’t needed. Once it comes together, get it off the counter, form those two flat, 1-inch thick discs, wrap them up tight, and walk away. You need at least two hours of chilling time, minimum. You can read more about why dough resting is key in this homemade pie crust recipe with butter that flakes.
Cutting in the Butter for Maximum Flakiness
Don’t pulverize those butter chunks! That’s the biggest mistake rookies make. You are not making sand; you are creating layers. If you’re using your fingers—which I mostly do because I don’t always want to wash another gadget—use your fingertips to pinch and smear the butter into the flour. You want rough texture, a mix of something floury and something that looks like little shiny pebbles of butter. If you see those pea-sized bits, you know you’re on the right track for a super flaky result. That beautiful unevenness is what separates a good crust from a great one.
The Essential Rest: Why Chilling Your butter pie crust Dough Matters
This resting period isn’t optional downtime; it’s phase one of building your structure. When you work the dough, you’re developing gluten, which makes bread chewy but makes pie crust tough. Chilling lets all that gluten relax so your dough rolls out smoothly later without snapping back on you. Plus, it locks that cold butter in place. Seriously, this step is what turns this dough into the most tender pie shell you’ve ever made. If you rush the chill time for your butter pie crust, you are guaranteeing a fight when you try to roll it out. Don’t fight the dough; just wait five minutes! You can check out other professional techniques for inspiration here: easy all butter pie crust.
Rolling Out Your Perfect Pie Bottom Crust
Okay, you’ve waited the requisite time, and now it’s time to transform those cold discs into something ready for baking. Before you even touch the dough, take one disc out of the fridge and let it sit on the counter for about five to ten minutes. If it’s rock hard, it will snap the second you try to roll it, and then you have to start wrestling with it! We want it pliable, not sticky.
Get a little flour down on your surface, but don’t overdo it; too much flour makes the dough dry and tough. Take your rolling pin and start rolling from the center and push outward gently. I always try to rotate the dough a quarter turn after every few rolls. This keeps it from sticking and helps you keep that circle even. You’re aiming for about a 12-inch circle when you’re done—big enough to drape nicely over that standard pie plate. If the edges start looking sad or you notice a little crack forming, don’t panic! That’s where that scrap dough comes in handy.
If you get a crack, just tear off a tiny piece of dough and press it right over the break, smoothing it in with your fingers. It’s my go-to fix, and honestly, nobody ever notices once it’s filled and baked. This is a skill I learned making hundreds of lattice tops for cherry pie!

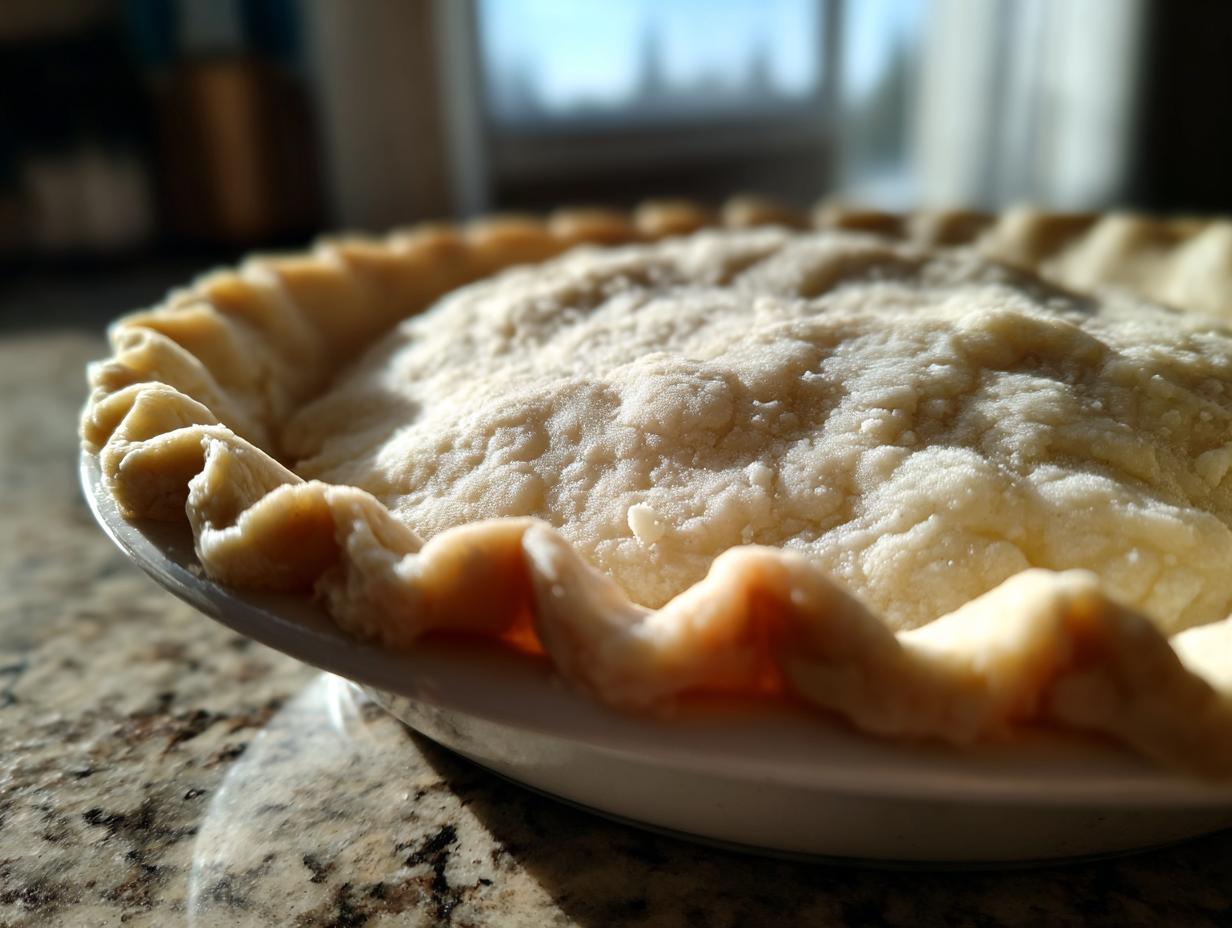
Once you have that gorgeous 12-inch circle, gently drape it over your pie plate. Don’t just drop it in the middle, or you’ll stretch the bottom too thin. Use your fingers to ease it down into the corners without pulling or stretching. Trim that excess dough around the rim, crimp it however fancy your heart desires, and then—yes, this is important—put the whole thing back in the fridge while you prep your filling. That final 30-minute chill sets the shape before the heat hits it, which is insurance against slumping!
Tips for Success with Your Flaky Pie Crust Recipe
Even with the best instructions, sometimes the dough needs a little extra coaching. Think of these tips as me leaning over your shoulder, sharing those little insider secrets I picked up working the line. These aren’t in the main steps, but they are what keep this flaky pie crust recipe perfect, especially when baking for the holidays.
First things first: that temperature rule? It’s non-negotiable. I say keep that butter and water as cold as possible. If the butter melts before it encounters the oven heat, it can’t create those beautiful steam pockets when it finally cooks. You get a tough, oily mess instead of those lovely layers. Trust me, working fast when handling the dough—especially if your kitchen is warm—is half the battle.
Now, what happens if you’re rolling things out and you notice a crack? It happens! Especially if you’re rushing the dough after refrigeration. Don’t throw it out! Just grab a tiny bit of leftover dough, make a little patch, and press it right over the tear. Smooth it gently with your finger. If you’re using this recipe for a classic pumpkin pie, nobody will ever see that patch under the filling, anyway. You can see how they handle quick fixes over at this buttery flaky pie crust tutorial.
Also, remember what you get out of this effort. This recipe makes a hefty yield—enough for one perfectly crimped double-crust pie, or two gorgeous single pie shells if you’re planning on making a couple of small custard pies. If you’re doing a double crust, keep that top layer chilled just as long as the bottom!
For more inspiration on combining this rich dough with fruit fillings, check out my guide on my blackberry pie recipe flaky crust. That rich, buttery fat just cuts through the tartness of the fruit perfectly!
Making a Double Crust Pie Dough: Next Steps for Your butter pie crust
So you made those two beautiful discs? Awesome! That means this recipe covers you for a full double-crust pie, maybe the best one you’ve ever made for Thanksgiving or Christmas. If you are making a classic like my classic apple pie recipe, you’ll need that top layer, naturally.
When you’re ready to roll out the second piece of your butter pie crust dough, it’s the exact same drill as the first—let it sit out just long enough to avoid cracking, roll it evenly, and try not to stretch it. If you’re using it for a top crust, you can get a little more creative with venting; cut slits, cut out simple shapes, or even use cookie cutters to make little decorative stars or leaves. A rough lattice where you just weave a few strips across is also far easier than most people think!

Now, what if you’re only making a single-crust pie, like for pumpkin or pecan? Take that second disc, wrap it up tight, and pop it into the freezer. It freezes beautifully! I always have a spare shell hiding in my freezer for one of those last-minute dessert emergencies. It thaws overnight in the fridge, ready to use another day. This is the beauty of mastering this base—it’s always ready when you are.
If you happen to be making a custard pie that needs to be baked empty first—we call that blind baking—you should line your rolled-out shell with parchment paper and fill it with dried beans or pie weights. However, for pies filled with something that bakes up semi-soft, like pumpkin, I usually skip the blind bake. The cold butter and the second chilling time I mentioned earlier usually create enough steam barriers to keep that bottom shell from getting soggy. For more ideas on using this dough, check out how others are utilizing their butter pie crust recipes!
Serving Suggestions for Your Sweet and Savory Pie Base
Now that you have this absolutely gorgeous, tender pie shell ready to go, the biggest question is: what are you going to fill it with? The best part about having a truly excellent, flavorful base dough like this one is that it loves everything. I mean it—every filling sings when backed by this buttery flavor.
For the holidays, you obviously have to go classic. This dough is the ultimate foundation for a **pumpkin pie recipe**. It holds up beautifully when baked, and you don’t get that dreaded soggy bottom because those fat layers are doing their job protecting the base from the custard. And don’t forget the pecan lovers! It works like a charm for a **pecan pie**; the richness of the crust is the perfect foil for the super sweet, crunchy filling.
But don’t just think sweet! If you are looking for something savory, this dough transforms immediately into the perfect base for virtually any dinner pie or quiche. Imagine a creamy chicken pot pie or a hearty mushroom tart resting in this golden pastry. It’s sturdy enough to handle a heavy savory mix but still light enough that it melts in your mouth. This dough really earns its keep!
If you need some inspiration for what to put *in* your crust that leans sweet, make sure you check out how I use pecans in my pecan pie dump cake—it gives you that flavor without the fuss of a traditional crust!
Storage and Reheating Instructions for Homemade Pie Dough
The best part about making this homemade pie dough ahead of time? You save yourself a ton of stress later! Nobody wants to panic the night before Thanksgiving realizing they haven’t even started their pie base. Since we used only butter and kept everything cold, this dough holds up fantastic in the fridge, and it’s even almost as good when frozen.
When you’ve finished dividing your dough into those two flat discs, wrap each one *tightly* in plastic wrap. I mean it—no air gaps allowed! Stuffed into the fridge, this dough is perfectly happy chilling out for up to three days. That gives you a solid window to plan your filling, shop for apples, or just recover from making the dough itself!
If you know you won’t need it within those three days, you move to the freezer stage. Wrap the plastic-wrapped discs tightly again, maybe adding a layer of foil for extra protection against freezer burn. You can keep them frozen solid for about two months. When you’re ready to use it, just move the disc from the freezer straight to the refrigerator. It needs a good overnight thaw, maybe 10 to 12 hours, to get back to that perfect, rollable consistency.
When you go to roll it out, remember the rule: if it feels too stiff, let it sit on the counter for five minutes. Don’t try to force it to roll when it’s just coming out of the fridge. Quick tip: if you’re thawing it for use in a savory dish, like a pot pie filling, grab your other ingredients for your homemade tomato salsa canning project while you wait for the dough to come around. It’s all about productive waiting in the kitchen!
Frequently Asked Questions About Making a butter pie crust
I’ve answered a few of the questions I always get when I share this recipe, especially from folks making their very first easy chili recipe and realizing they need a good topping! Don’t sweat it—nearly every pie disaster can be fixed with a little know-how.
Why is my butter pie crust tough instead of flaky?
Usually, toughness comes from overworking the dough. Remember how I stressed using quick hands and only mixing until the dough *just* comes together? When you knead it like bread dough, you develop too much gluten, which makes it chewy. Also, if your butter melts even a tiny bit before it hits the oven, those layers vanish, and you get density instead of flakiness. Keep it cold, keep it gentle!
Can I substitute anything in this butter pie crust recipe?
Look, if you want the absolute best, tender pie shell, you really need to stick to the butter. That’s the flavor powerhouse! You can sometimes swap salted butter for unsalted, but you must reduce the added salt in the recipe by about a quarter teaspoon—that’s the trade-off. Substituting shortening or oil instead of butter? Sure, you can technically do it, but then you aren’t making an butter pie crust anymore, and you lose that amazing richness. I strongly advise sticking to the recipe for this one!
What if I don’t have ice water? Can I use regular cold water?
Listen, I’ve done it in a pinch, but I really don’t recommend it! Yes, the water needs to be cold, but *ice* water is critical because it keeps the butter from softening while you’re mixing. If your water is just tap-cold, it might warm up too much during the mixing process and start melting those butter pockets we worked so hard to create. If you don’t have ice, put your measured water in the freezer for 15 minutes before you start; that should get it cold enough. For more insight on making the absolute best dough, take a peek at this resource on all butter pie crust recipes.
My dough cracked while rolling. Is it ruined?
Absolutely not! That just means you took it out of the fridge and tried to roll it before it softened up just a hair. It’s not ruined at all. Take a small scrap piece of that dough—we all have scraps, right?—wet your fingers just a tiny bit, and gently press the scrap over the crack, smoothing it out until it disappears. It mends like magic. Then, put the dough back in the fridge for 10 minutes before trying to roll again. No need to toss a whole baking project!
Share Your Perfect butter pie crust Creation
I truly hope this recipe brings you zero stress and all the flakiness you dreamed of! Seriously, if you are someone who used to run screaming from making homemade dough, I want to hear from you. Did you manage to get those perfect, visible layers? Did this become your go-to butter pie crust for your next holiday filling?
Please leave a rating below—it helps other bakers know this little piece of kitchen slang is worth learning. If you took a photo of your glorious, golden-brown pie shell, tag me! I love seeing my recipes come to life in your kitchens. Happy baking!
Share Your Perfect butter pie crust Creation
I truly hope this recipe brings you zero stress and all the flakiness you dreamed of! Seriously, if you are someone who used to run screaming from making homemade dough, I want to hear from you. Did you manage to get those perfect, visible layers? Did this become your go-to butter pie crust for your next holiday filling?
Please leave a rating below—it helps other bakers know this little piece of kitchen slang is worth learning. If you took a photo of your glorious, golden-brown pie shell, tag me! I love seeing my recipes come to life in your kitchens. If you need to get a hold of me with questions or just to share a win, feel free to reach out on my contact page. Happy baking!
PrintFoolproof Flaky All Butter Pie Crust Recipe

Make this simple butter pie crust for tender layers that stay crisp. This recipe uses only four ingredients and guarantees a flaky, rich pastry perfect for any sweet or savory pie.
- Prep Time: 20 min
- Cook Time: 0 min
- Total Time: 2 hr 20 min
- Yield: One double crust
- Category: Baking Base
- Method: No-Bake/Chilling
- Cuisine: American
- Diet: Vegetarian
Ingredients
- 2 1/2 cups all-purpose flour
- 1 teaspoon salt
- 1 cup (2 sticks) unsalted butter, very cold and cut into 1/2-inch cubes
- 1/2 cup ice water, plus 1 to 2 tablespoons more if needed
Instructions
- Combine the flour and salt in a large bowl.
- Add the cold butter cubes to the flour mixture. Use a pastry blender or your fingers to cut the butter into the flour until the mixture resembles coarse crumbs with some pea-sized pieces of butter remaining. This step is key for a flaky pie crust.
- Gradually drizzle the ice water over the mixture, one tablespoon at a time, tossing lightly with a fork after each addition. Stop adding water when the dough just begins to come together when squeezed. You may not need all the water.
- Turn the dough out onto a clean surface. Quickly gather the dough and form it into two flat discs, about 1 inch thick. Do not overwork the dough.
- Wrap each disc tightly in plastic wrap and refrigerate for at least 2 hours, or up to 3 days. This chilling time allows the gluten to relax and the butter to firm up, which is essential for a tender pie shell.
- When ready to roll, let one disc sit at room temperature for 5 to 10 minutes to soften slightly. On a lightly floured surface, roll the dough from the center outward into a 12-inch circle.
- Carefully transfer the dough to your pie plate. Trim and crimp the edges as desired. If making a double crust pie, repeat the rolling process for the top crust.
- Chill the assembled pie shell for at least 30 minutes before baking for the best results.
Notes
- Keep your butter and water as cold as possible; this prevents the butter from melting before it hits the oven, which creates steam pockets for flakiness.
- If the dough cracks while rolling, let it rest for five minutes, then patch it with a small piece of scrap dough.
- This recipe makes enough for one double-crust pie or two single-crust pie shells.
Nutrition
- Serving Size: 1/8 of crust
- Calories: 280
- Sugar: 0.1
- Sodium: 180
- Fat: 18
- Saturated Fat: 11
- Unsaturated Fat: 7
- Trans Fat: 0.5
- Carbohydrates: 26
- Fiber: 1
- Protein: 4
- Cholesterol: 45