
Let’s be real, weeknight dinners need a side dish that doesn’t feel like a total chore, right? So many recipes call for fancy gear or take way too long. That’s why I’m obsessed with showing you how to nail the perfect turmeric rice. I’m Zoe Thompson from Kitchen Slang, and I specialize in translating that intimidating chef’s knowledge into something you can actually whip up fast.
Forget soggy rice. We’re going for fluffy, vibrant, and packed with flavor—all in about 30 minutes. This method borrows a little trick from professional kitchens to ensure you get that beautiful texture without stressing over the stove. Seriously, this is the easiest way to brighten up whatever you’re serving tonight.
- Why This Garlic Butter Turmeric Rice is Your New Weeknight Rice Recipe
- Gathering Ingredients for Your Easy Turmeric Rice
- The Foolproof Method for Perfect Turmeric Rice on the Stovetop
- Alternative Cooking Methods for Your Turmeric Rice
- Ingredient Notes and Variations for Flavorful Side Dishes
- Tips for Making Truly Fluffy Turmeric Rice Every Time
- Serving Suggestions: What Pairs Well with Turmeric Rice
- Storage and Reheating Instructions for Leftover Turmeric Rice
- Frequently Asked Questions About This Turmeric Rice Recipe
- Share Your Experience Making This Turmeric Rice
Why This Garlic Butter Turmeric Rice is Your New Weeknight Rice Recipe
Okay, this isn’t just *any* rice. This specific garlic butter turmeric rice is going to change how you think about side dishes. In the professional kitchens I learned in, speed without sacrificing flavor was the name of the game, and this recipe nails that balance.
Why should you make this tonight? Check out the value breakdown:
- Speed Demon: We’re talking 30 minutes total, which is faster than most takeout on a busy Tuesday. It’s the ultimate quick rice side dish.
- Texture Victory: I promise you, this is incredibly fluffy turmeric rice. We nail the rest phase so you never get sticky mush.
- Flavor Punch: It’s rich, savory, and golden! That little bit of buttery turmeric rice flavor thanks to sautéing the aromatics first makes all the difference.
It’s simple, but every step is designed to deliver maximum payoff for minimum fuss. Trust me, this hits the spot every single time.
Gathering Ingredients for Your Easy Turmeric Rice
We want this basmati rice with turmeric to be perfect, which means grabbing the good stuff and prepping correctly. Good news—this list is short, relying on pantry staples you probably already have. No mystery vegetables or three-day marinades here!
Remember, flavor starts with fat! We’re using a mix of butter and oil to coat everything nicely before the liquid goes in.
- 1 tablespoon butter (for flavor!)
- 1 teaspoon olive oil
- 1 small yellow onion, finely chopped (this builds the base layer of savory goodness)
- 2 cloves garlic, minced (seriously, don’t skip this—it’s a flavor powerhouse)
- 1 ½ cups basmati rice, rinsed (Rinsing is non-negotiable for that fluffy texture, okay? We need to wash off that surface starch!)
- 2 teaspoons ground turmeric (This is all about that vibrant color and earthy warmth)
- ½ teaspoon salt
- ¼ teaspoon black pepper (Here’s a little chef trick: black pepper helps your body absorb the goodies in the turmeric, specifically the curcumin. It’s a tiny pinch, but it counts for our anti inflammatory rice goal!)
- 2 ½ cups chicken broth or vegetable broth (Your choice, depending on your diet!)
- 1 tablespoon fresh lemon juice (optional, but wow, does it brighten things up at the end)
- 2 tablespoons fresh parsley, chopped (for garnish and that pop of fresh green)
That’s it! Grab your saucepan, and let’s translate these simple items into something great.
The Foolproof Method for Perfect Turmeric Rice on the Stovetop
Alright, now that we have our ingredients lined up, it’s time for the actual magic. This is where most folks go wrong with rice—they just dump it all in and hope for the best. Nope! We’re using a technique I picked up working the line, the one that guarantees you get beautiful, fluffy turmeric rice every time, even on a busy night. This whole process is my guide to the best stovetop rice cooking.
Sauté Aromatics and Toast the Turmeric Rice
First things first, we need to wake up those flavors. Melt your butter with the olive oil in a medium saucepan over medium heat. Toss in that chopped onion—let it soften up until it’s almost see-through, about four minutes. Don’t rush it; that sweetness is important!
Now, toss in the minced garlic. You only want about 60 seconds here, just until you can really smell it—that’s when the oil is infused and ready. Seriously, watch that garlic; if it burns, you’ll start over. That’s not a drill; burnt garlic tastes bitter!
Next up, knock the heat down slightly. Add your rinsed basmati rice, the turmeric, salt, and pepper. This is the toasting step, and I’m telling you, it’s genius. Stir this constantly for a full minute to lightly toast the grains and coat them in that fat and spice blend. It locks in the structure so the grains don’t break apart later.
Simmering and Resting for Fluffy Turmeric Rice
Once everything is perfectly coated, pour in your broth. Turn the heat up until you get a solid, rolling boil. Now, listen closely because this is my chef tip: As soon as it boils, immediately reduce the heat to the absolute lowest setting your stove offers. Like, low enough that it barely tickles the bottom of the pot.
Here’s the golden rule for any simple rice recipe: Cover that saucepan TIGHTLY. I mean, seal it like you’re locking away state secrets. Simmer this for exactly 15 minutes. You must, under penalty of mushy rice, not lift that lid once. If you peek, the steam escapes, and you ruin the whole process.
After 15 minutes, turn the heat OFF completely, but leave the pot exactly where it is, still covered, for another 10 minutes. This resting phase absorbs the remaining steam and makes for truly superior, fluffy turmeric rice. Don’t skip this resting time; it’s crucial!
Finishing Touches for Aromatic Yellow Rice
Okay, you can lift the lid now! The scent filling your kitchen should be amazing—this is your aromatic yellow rice announcing itself. Grab a fork—not a spoon, a fork!—and gently fluff the rice, separating those beautiful golden grains. Don’t mash it!
If you are using it, now is the time to stir in that burst of fresh lemon juice. It cuts through the richness perfectly. Finally, sprinkle that fresh chopped parsley over the top for color and freshness before you serve it up hot. See? Easy! No guesswork involved.
Alternative Cooking Methods for Your Turmeric Rice
I know not everyone wants to stand over a saucepan, waiting for that perfect 15-minute simmer. That’s why, as a translator of kitchen lingo, I have to give you the scoop on using your other favorite gadgets. If you’ve got a rice cooker or an Instant Pot, this flavor profile transfers beautifully. It just changes the monitoring game!
This is your guide to getting that same vibrant, buttery turmeric rice without the watchful eye on the stovetop. You can check out my general guide on how to make rice pilaf too, but these tailored instructions make sure the turmeric doesn’t break the machine!
Using Your Rice Cooker for Golden Rice Recipe
The rice cooker is probably the easiest route for this golden goodness. The machine handles all the temperature control, which is why it’s famous for making incredible fluffy turmeric rice.
The key here is putting everything in *before* you start it. You don’t want to sauté onions in the cooker itself; start them on the stove if you want that flavor layer, or just skip it and rely on the spices.
- If you’re using a rice cooker, you should combine the rinsed rice, the broth, the butter, oil, onion chunks (if skipping the sauté), garlic, turmeric, salt, and pepper all right there in the cooker pot.
- Just use the standard white rice setting. That machine knows what it’s doing!
- Once the cook cycle ends, let it rest for 5–10 minutes, take the lid off, and gently fluff. Stir in that optional lemon juice and parsley right at the end. Easy peasy!
This method guarantees you get those beautifully colored grains without worrying about scorching the bottom—perfect for a reliable rice cooker turmeric rice side.
A Note on Instant Pot Rice
If you use an Instant Pot, you absolutely can use this recipe, but you need to adjust the liquid ratio slightly because the pressure cooker retains so much more moisture. Always check out reliable Instant Pot rice guides for exact measurements, but generally, I’d drop that liquid down to about 2 cups for 1.5 cups of rice when pressure cooking.
I recommend using the ‘Sauté’ function for steps 1 through 4—getting the flavor base going with the onion, garlic, and toasting the spice and basmati rice with turmeric. Then, add the liquid, seal it up, and set it to High Pressure for 4 minutes, followed by a Natural Pressure Release (NPR) for at least 5 minutes before manually venting. That’s how you get the best results in your pressure cooker!
Ingredient Notes and Variations for Flavorful Side Dishes
Knowing how to play around with ingredients is what separates following a recipe from truly cooking, you know? This easy turmeric rice is super solid as written, but a few tweaks can turn it into something completely new while still keeping that gorgeous color and texture. I always encourage my readers to experiment, especially when it comes to creating flavorful side dishes that match whatever main course you’ve got planned.
Let’s talk about those notes from the original testing phase. These are the little bits of wisdom that make a difference between good rice and *great* rice.
First, about that richness: If you want to take this from a standard side dish to something way more decadent—especially if you are serving it with something mildly spiced—try substituting about half of your broth with full-fat coconut milk. You’ll want to check your liquid ratio slightly because coconut milk is thicker, but wow, the creaminess it adds is incredible. You can see an example of this technique over at a great coconut rice recipe.
Remember that pinch of black pepper I asked you to add with the turmeric? That’s not just for seasoning! Turmeric has amazing anti-inflammatory properties, but our bodies struggle to absorb the main active compound, curcumin, on its own. Adding just a tiny bit of black pepper (which contains piperine) radically increases that absorption. So, every time you make this batch of anti inflammatory rice, you’re actually making it work harder for you health-wise.
Finally, the broth choice impacts the whole flavor. If you use beef broth instead of chicken or veggie broth, you get a deeper, earthier tone. If you’re keeping things vegan, make sure your veggie broth is actually flavorful; thin broth equals bland rice, plain and simple. It’s all about layering those foundational tastes!
Tips for Making Truly Fluffy Turmeric Rice Every Time
You’ve nailed the flavor with the garlic and the turmeric, but let’s talk about texture for a second. When people search for the best turmeric rice, what they really want is that light, individual grain—no clumps, no gummy bits. Achieving perfect rice is less about magic and more about following a few non-negotiable steps. This is where I translate those technical cooking details into a solid, working simple rice recipe you can trust.
Here are the three things I always preach about when making rice at home to ensure it comes out airy and perfect every single time:
That Crucial Rinse
I know it seems messy—a sink full of cloudy water—but you absolutely have to rinse your basmati rice before it even sees the pot. Why? Basmati, especially, has a powdery starch coating on the outside of the grains. If you cook that starch right along with the rice, it releases into the cooking liquid and essentially glues all your grains together when they cool down, turning them into mush.
I rinse mine in several changes of cool water until that water runs almost clear. It seems tedious, but for true separation and that luxurious, light feel, it’s necessary. It’s the foundation of cooking any great grain, really.
Mastering the Liquid Ratio
In our recipe, we used 1 ½ cups of rice to 2 ½ cups of liquid. That ratio, roughly 1 part rice to 1.66 parts liquid, is ideal for Basmati when you are steaming it on the stovetop like this. Chef’s often measure liquid by weight, but for home cooks, getting the volume right is key.
If you use a different grain—like Arborio (don’t even think about it for this side!) or even standard long-grain white rice—that ratio changes completely. If you substitute your rice type, you’ll need to adjust your liquid up or down. For Basmati, stick to the 1.66 ratio, and trust the process. This precise measurement prevents that gummy texture you sometimes get when there’s too much water hanging around during the simmer.
The Power of the Rest (Don’t Touch It!)
This is the step that separates the pros from the panicked home cooks. After the 15 minutes of low simmering, when you pull the pot off the heat, that’s only half the job done. Those grains are cooked, but they are still soaking in steam. If you lift the lid right then to check or serve, that sudden rush of cool air hits the grains, and they contract awkwardly, leading to uneven textures.
That mandatory 10-minute rest, covered, lets the steam evenly distribute throughout the pot. It finishes the cooking gently and firms up the outer shell of each grain, which is what makes the rice hold its shape and look gorgeous when you finally fluff it. People try to rush this part, but it delivers the secret to fluffy turmeric rice every time.
Serving Suggestions: What Pairs Well with Turmeric Rice
The best part about creating a fantastic quick rice side dish like this is how versatile it is! Once you have this bright, flavorful rice ready, it acts like a gorgeous, sunny canvas for almost anything you want to put next to it. Seriously, it elevates dinner without adding any extra work to your plate. I’ve used this exact batch countless times for everything from a simple weeknight meal prep to a slightly fancier Saturday night dish.
Because our easy turmeric rice recipe is savory, buttery, and seasoned with garlic, it works wonderfully across a bunch of different cuisines. You don’t need to rethink your main course just because you’re serving a bright yellow side!
Here are a few of my go-to pairings when I pull this rice off the stove:
- Grilled or Roasted Chicken: The bright turmeric flavor cuts through rich poultry perfectly. If you’re making something simple like my Bruschetta Chicken, this rice makes the whole plate look instantly more intentional.
- Seafood: It is absolutely sensational under pan-seared salmon or shrimp scampi. That little hint of lemon juice we added to the rice really sings when paired with flaky fish.
- Curries and Stews: If you’re making a heavy curry—whether it’s Indian-inspired or something lighter—this rice is sturdy enough to soak up the sauce without turning into sludge. It’s a much more exciting base than plain white rice.
- Simple Veggies: Honestly, sometimes veggies are the main event! Roasted broccoli, sautéed green beans, or a big plate of roasted cauliflower shine when served over a bed of this aromatic yellow rice.
It’s also fantastic as the base for your bowl meals! Try spooning some pulled pork or slow-cooked shredded chicken over it for a quick meal prep lunch. See how easily this can anchor your whole dinner? It really does go with everything.
If you’re looking for more ideas that pair well with flavored rice, you might want to check out my recipe for Chicken Pad Thai; the flavors contrast in a surprisingly good way with the earthy turmeric!
Storage and Reheating Instructions for Leftover Turmeric Rice
The best part about making a big batch of this turmeric rice? You get leftovers! And frankly, I think it tastes even better the next day because those spices have had a chance to really settle in. But we don’t want to ruin that beautiful texture we worked so hard for by reheating it wrong, right? We need to treat our leftovers with respect so they still come out fluffy.
This is all about restoring that steam and moisture.
How to Store Your Golden Rice
First step: get it cooled down and into a proper container. Don’t leave cooked rice sitting out on the counter for more than an hour or two—that’s just not safe, and we’re aiming for trustworthiness here!
Pop leftovers into a shallow, airtight container. Shallow is better because it cools down faster, which is safer for any rice dish. You can usually keep this simple rice recipe in the fridge for about three to four days. If you know you won’t get through it in that time, you can absolutely freeze it. Just make sure you let it cool before sealing it up totally airtight.
Reheating to Restore Fluffiness
Okay, here’s where people mess up. If you just nuke it in the microwave plain, you’re going to end up with dry, hard rice on the edges and lukewarm clods in the middle. No thank you!
The key to beautiful reheating, whether you use the microwave or the stovetop, is reintroducing moisture. For proper fluffy turmeric rice post-fridge:
- Stovetop Magic: This is my favorite method if you are reheating a larger portion. Place the rice in a pot over medium-low heat. Add maybe a tablespoon or two of water or broth per cup of rice you are reheating. Cover it tightly and let it steam gently for about 5–7 minutes until steamy throughout. It breathes new life into the grains!
- Microwave Quick Fix: If you only need a single serving, place the rice in a microwave-safe bowl. Add a tiny splash of water or broth right over the top but try not to drown it. Cover the bowl loosely with a damp paper towel before microwaving. This traps the steam right around the grains. Heat in 30–second bursts, fluffing in between, until piping hot.
If you reheated frozen rice, you might need a little extra liquid and a slightly longer cook time, but the principle remains the same: steam it back to life! Don’t try to reheat until it’s boiling hot; just aim for pleasantly warm and perfectly soft.
Frequently Asked Questions About This Turmeric Rice Recipe
I always get questions when people try a new grain recipe, especially when we start messing with cooking times to get that perfect fluff. Here are some of the things I hear most often about this easy turmeric rice. If I missed yours, drop it in the comments below, and I’ll translate the answer for you!
Can I use long-grain white rice instead of basmati for this turmeric rice?
You totally can, but you need to adjust your liquid ratio, okay? Basmati is a bit more forgiving with its starch content, but standard long-grain white rice can get sticky if you use too much water. For two cups of standard long-grain white rice, I’d probably pull the liquid back just slightly, maybe to 2 ¼ cups instead of 2 ½ cups of broth. Keep that simmer time the same, but definitely watch it closely during the resting period. You might sacrifice that super-separate grain structure you get with Basmati, but the flavor will still be incredible!
How do I make this a complete meal, like a Golden Rice Recipe?
That’s the beauty of this versatile base! If you want to upgrade this from a side to a full-on Golden Rice Recipe, you just need to add your protein or veggies right back at the beginning with the onions and garlic. I love tossing in a cup of canned, drained chickpeas right when I add the rice to toast it—they get slightly nutty and hold up great.
If you’re using diced chicken or sausage, you’ll want to sauté that *first* until it’s mostly cooked before you add the onions. Then, remove it from the pan, cook your aromatics, toast the rice, and add the chicken back in right before you pour the broth. Done! It turns into a hearty, one-pot meal that’s packed with flavor.
Is this turmeric rice recipe vegetarian?
If you follow the recipe exactly as I wrote it using vegetable broth, then yes, this flavorful rice is totally vegetarian! Even better, if you skip the optional butter and use only olive oil in step one, it becomes vegan, too. It’s really flexible for anyone trying to eat plant-forward meals.
The only swap to watch out for is if you decide to use chicken broth for a deeper savoriness. If you’re serving vegetarians, just swap the chicken or beef stock for a really good-quality vegetable broth. You can find more tips on making side dishes that fit different dietary needs in my guide to easy chili recipes, which is another staple that’s easy to adapt!
If you want to see how others have adapted their versions, check out some popular ideas over at The Mediterranean Dish for inspiration!
Share Your Experience Making This Turmeric Rice
Alright, that’s the full translation for getting perfectly fluffy turmeric rice on your table in under 30 minutes. I truly hope this method makes your weeknights a little brighter and a lot tastier!
Now I need to know—did it translate well into *your* kitchen? Did you stick to the garlic and butter base, or did you try swapping in some coconut milk? Did you use vegetable broth or chicken broth? These little tweaks are how we all learn and build confidence.
Please leave a rating below! It helps me know which techniques are working best for the Kitchen Slang community. And if you had any snags, or if the rice came out weirdly sticky, drop your question in the comments. I promise to jump in and translate what went wrong!
We’re always building up our repertoire of amazing side dishes, and your feedback is what keeps the real talk flowing. Happy cooking, everyone!
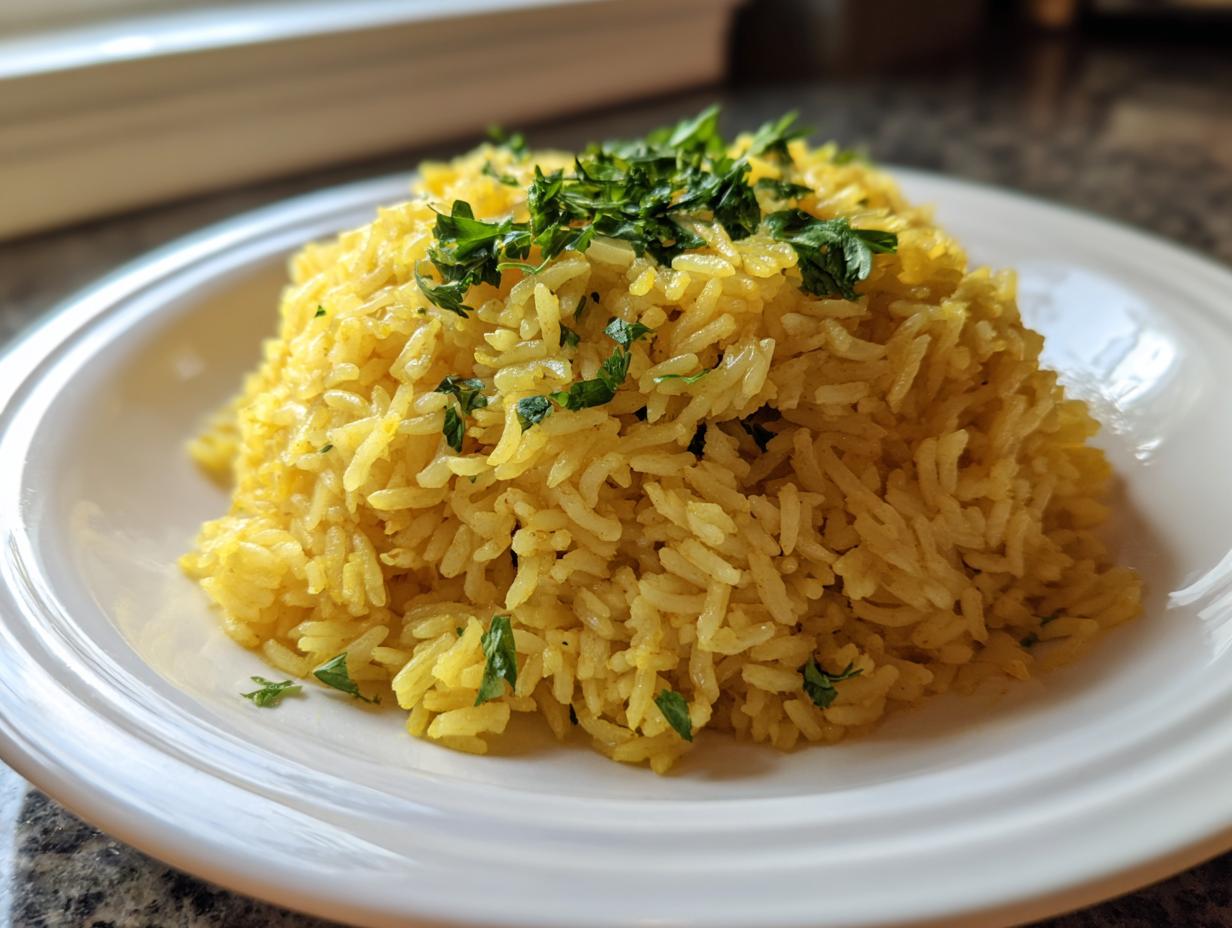
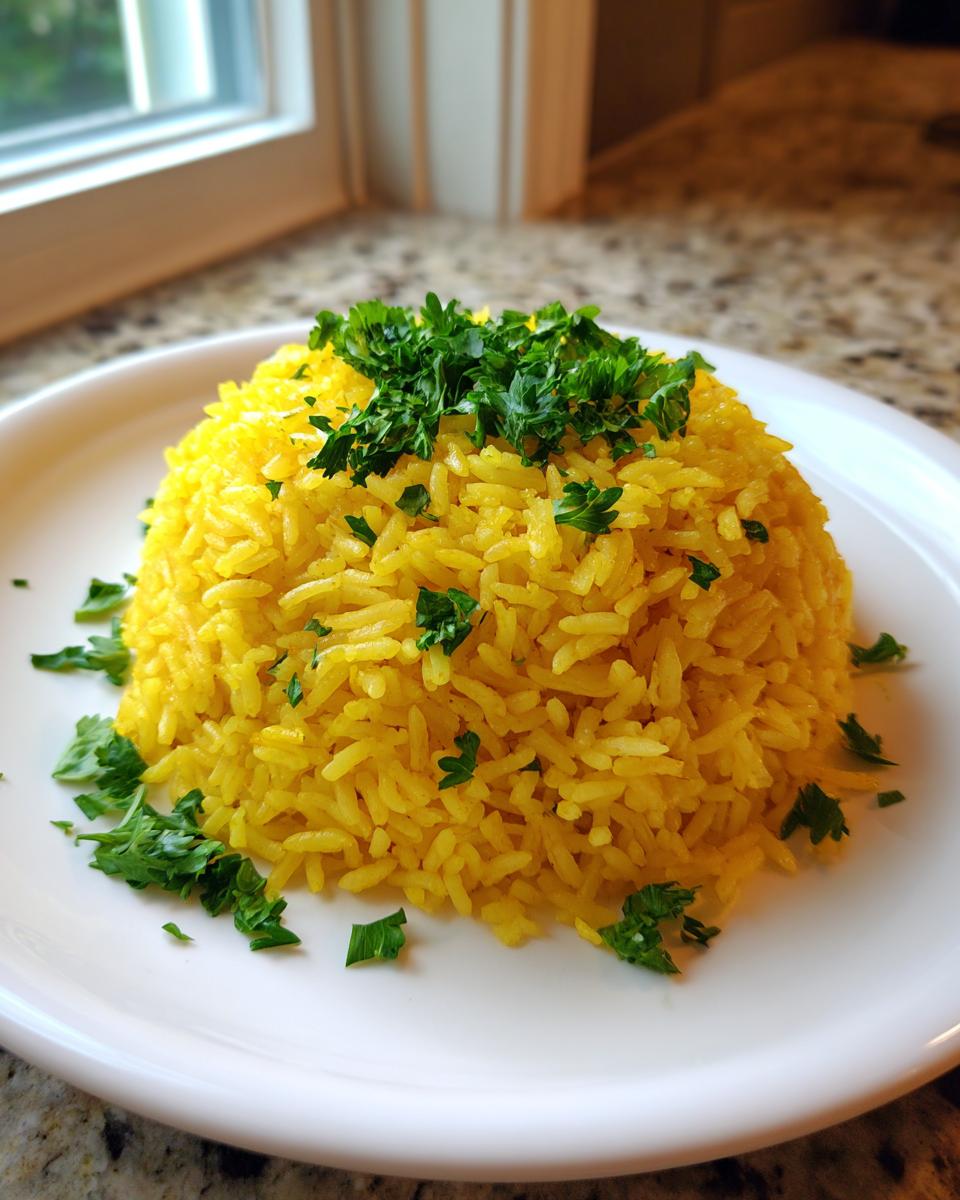
PrintEasy Garlic Butter Turmeric Rice

You get soft, fluffy turmeric rice fragranced with butter, garlic, and onion. This quick side dish comes together fast for your weeknight meals.
- Prep Time: 5 min
- Cook Time: 25 min
- Total Time: 30 min
- Yield: 4 servings 1x
- Category: Side Dish
- Method: Stovetop
- Cuisine: General
- Diet: Vegetarian
Ingredients
- 1 tablespoon butter
- 1 teaspoon olive oil
- 1 small yellow onion, finely chopped
- 2 cloves garlic, minced
- 1 ½ cups basmati rice, rinsed
- 2 teaspoons ground turmeric
- ½ teaspoon salt
- ¼ teaspoon black pepper
- 2 ½ cups chicken broth or vegetable broth
- 1 tablespoon fresh lemon juice (optional)
- 2 tablespoons fresh parsley, chopped (for garnish)
Instructions
- Melt the butter with the olive oil in a medium saucepan over medium heat.
- Add the chopped onion to the pan. Cook until the onion softens, about 4 minutes.
- Add the minced garlic and cook for 1 minute until you smell the aroma. Do not let the garlic burn.
- Add the rinsed basmati rice, turmeric, salt, and pepper to the pan. Stir constantly for 1 minute to toast the rice and coat it with the spices and fat. This step builds flavor.
- Pour in the chicken or vegetable broth. Bring the mixture to a boil.
- Once boiling, immediately reduce the heat to the lowest setting, cover the saucepan tightly with a lid, and simmer for 15 minutes without lifting the lid.
- Remove the saucepan from the heat and let it stand, covered, for an additional 10 minutes. This resting period creates fluffy rice.
- Remove the lid. Fluff the rice gently with a fork. Stir in the fresh lemon juice, if using.
- Garnish with fresh parsley before serving.
Notes
- For rice cooker use, combine the rinsed rice, broth, butter, oil, onion, garlic, turmeric, salt, and pepper in the rice cooker pot. Use the white rice setting. Add lemon juice and parsley after cooking.
- If you want a richer flavor, substitute half of the broth with full-fat coconut milk. Adjust liquid slightly if you do this.
- To get that anti-inflammatory boost, add a pinch of black pepper; it helps your body absorb the curcumin in the turmeric.
Nutrition
- Serving Size: 1 cup cooked
- Calories: 280
- Sugar: 1
- Sodium: 450
- Fat: 6
- Saturated Fat: 3
- Unsaturated Fat: 3
- Trans Fat: 0
- Carbohydrates: 50
- Fiber: 1
- Protein: 5
- Cholesterol: 8