
Ever spent hours getting those sugar cookies just right, only for the icing to spread into a sad, soupy puddle? Trust me, I’ve been there. That’s why I translate the secrets from busy bistro kitchens right here into Kitchen Slang. You need a formula that just *works*, especially when you’re counting on that beautiful, crisp finish. Forget those frustrating batches—I’m handing you the ultimate easy royal icing recipe today. We’re using meringue powder here because it locks in stability and gives you that bakery-perfect gloss. As the translator-in-chief, my goal is simple: give you professional results without the chef jargon!
- Why This Royal Icing Recipe Works for Beginners
- Gathering Ingredients for Your Royal Icing Recipe
- How to Make Royal Icing: Simple Mixing Technique
- Tips for Perfect Piping Icing Tutorial Results
- Troubleshooting Common Royal Icing Recipe Issues
- Making Ahead and Storing Your Icing That Dries Hard
- Serving Suggestions for Your Cookie Decorating Icing
- Frequently Asked Questions About This Royal Icing Recipe
- Rate This Reliable Baking Icing
Why This Royal Icing Recipe Works for Beginners
Listen, when you’re decorating cookies, you don’t have time for drama. You need an icing that shows up and does its job, whether you’re outlining or flooding. This isn’t just any frosting; I truly believe this is the best royal icing recipe you can find for totally consistent results. It means fewer headaches for you and beautiful cookies that actually look like the ones in the magazines!
- It mixes up lightning fast—ten minutes, tops!
- It transitions beautifully from stiff piping to smooth flooding consistency.
- It dries rock solid, which is essential for stacking or wrapping.
The Secret to Sturdy Icing That Dries Hard
What’s the magic move here? Meringue powder! Forget trying to fight with raw egg whites every time; that stuff is temperamental. Using meringue powder in this royal icing recipe means you get a stable, reliable base every single time. Simple powdered sugar glazes stay soft and sticky, right? This stuff sets up like cement—the good kind—giving you that professional, hard shell finish we all want.
Gathering Ingredients for Your Royal Icing Recipe
When it comes to a foolproof royal icing recipe, precision matters for that perfect texture. You only need four things, but you have to prep them right! Grab your mixer; we’re starting with the wet stuff first. You’ll need 6 tablespoons of warm water to bloom that meringue powder before anything else happens. Remember, the secret to a smooth batch starts right here with clean measurements!
Ingredient Notes and Substitutions
Okay, pay attention to the vanilla! If you want that stunning, showroom-worthy shine, you absolutely have to use clear vanilla extract. Standard vanilla has color and can dull the brightness, especially if you’re going for stark white or pale pastels. Also, we are definitely using meringue powder here because it’s the backbone of this reliable baking icing—it ensures that hard, durable shell we are aiming for.
How to Make Royal Icing: Simple Mixing Technique
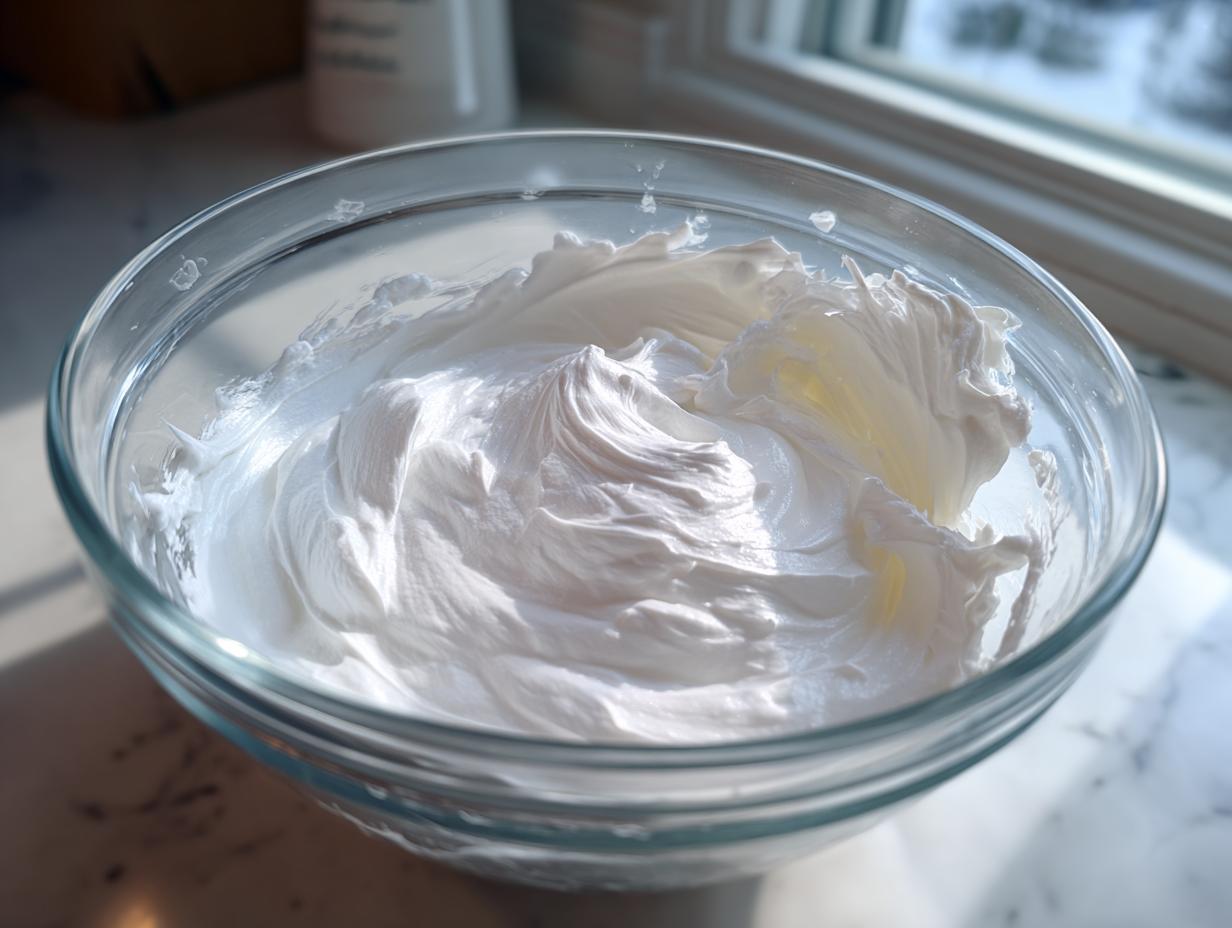
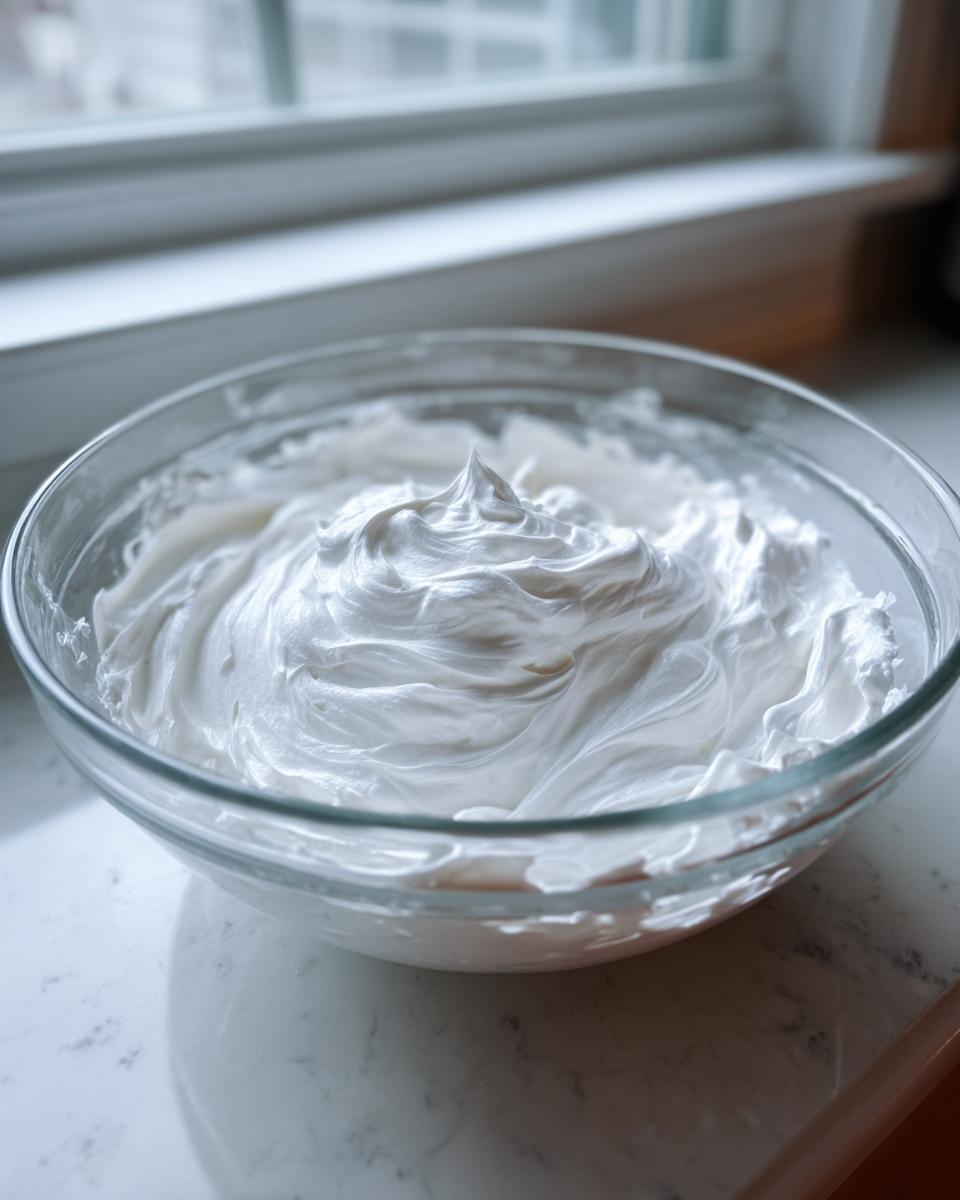
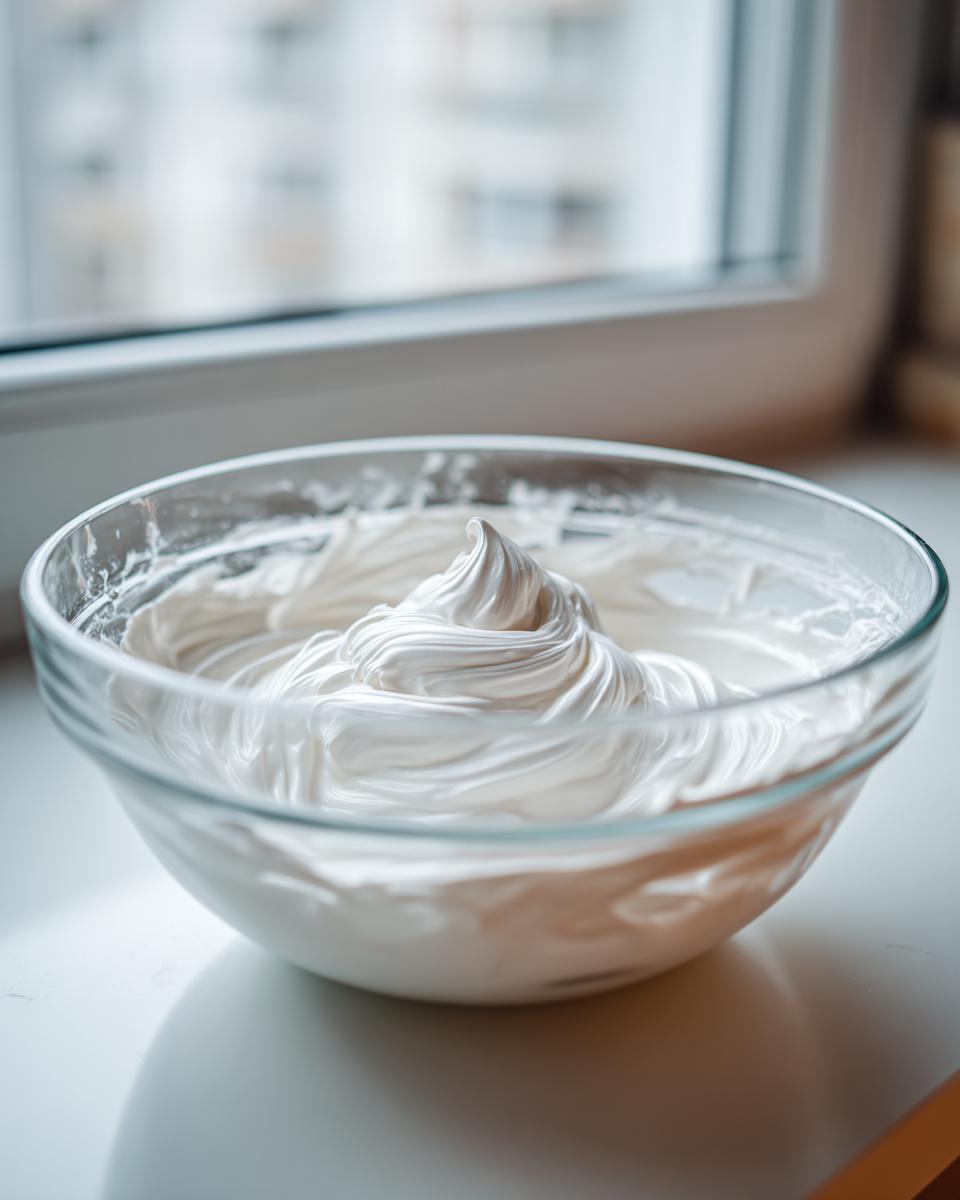
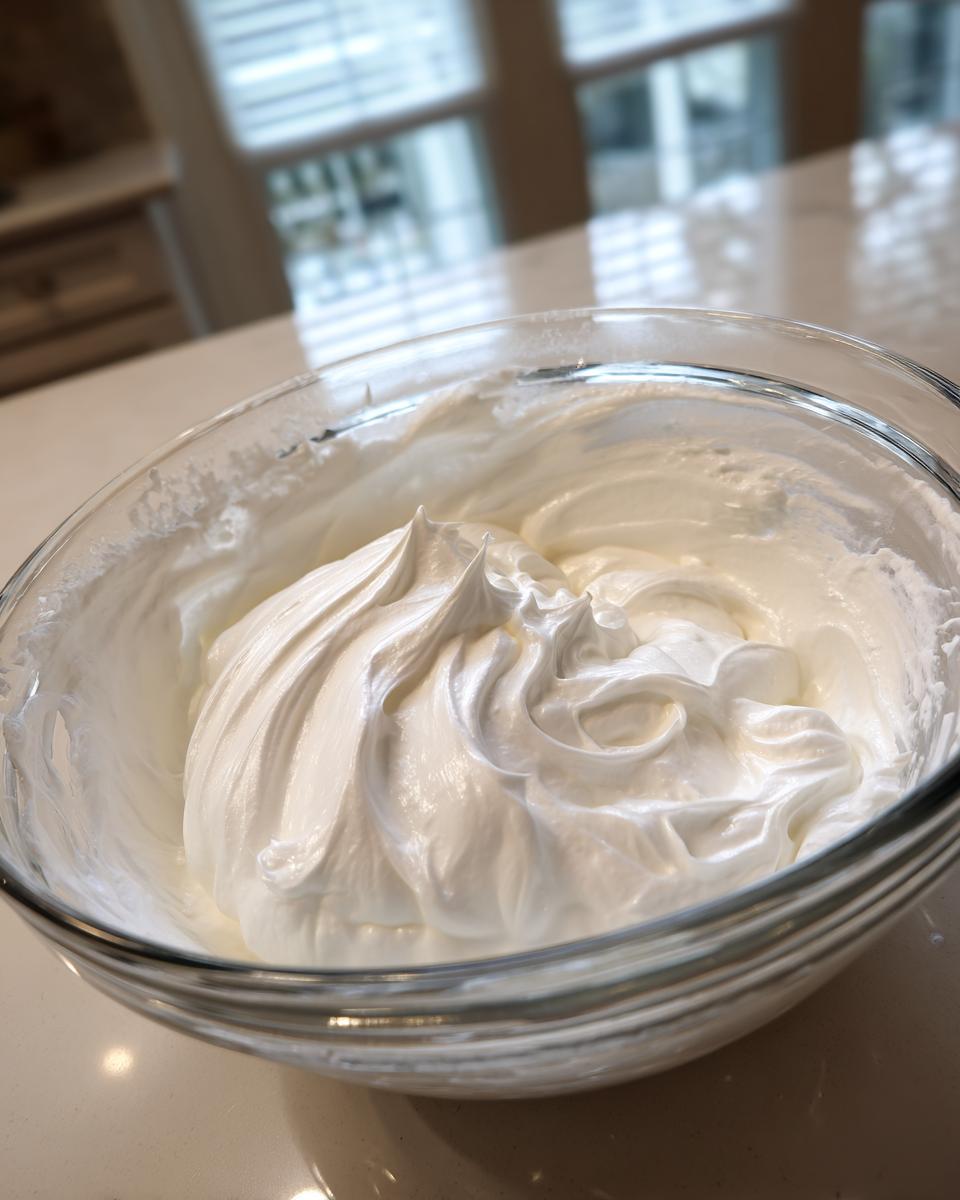
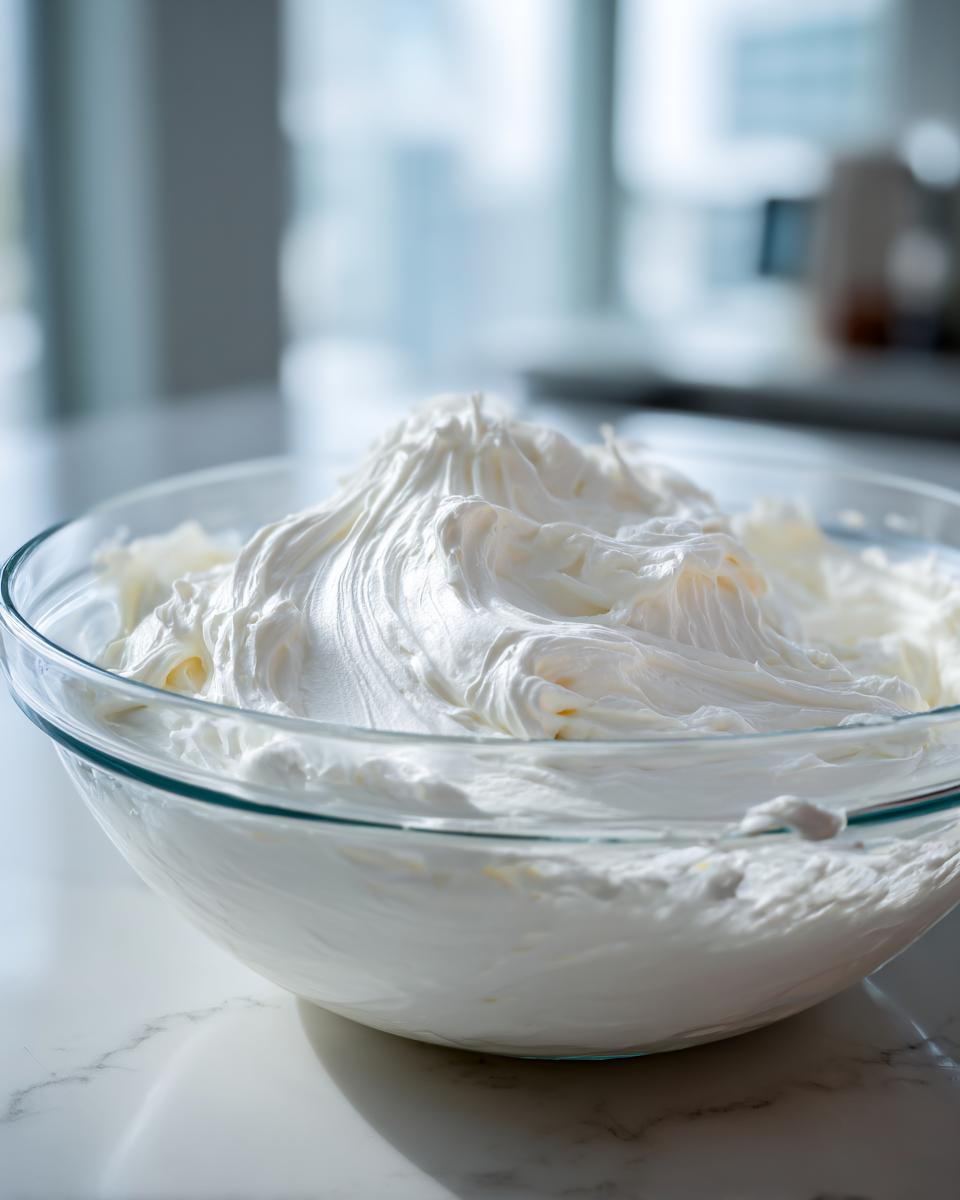
Alright, here’s where we put in the work. This is the moment that separates a good *royal icing recipe* from one you’ll want to throw out! You absolutely cannot dump everything in at once—that’s how you get clumps and uneven mixing. Start by whipping that meringue powder and warm water until it gets foamy and hits soft peaks. That’s your cue to introduce the powdered sugar gradually—low speed until it’s mostly incorporated. Then, we talk texture. Crank it up to medium-high and let it beat for a full 5 to 7 minutes. I watch mine turn bright white and seriously glossy. If you’re skipping this beating time, you skip the structure!
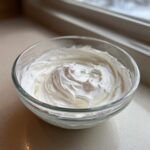
When it’s done, you should have a thick, stiff consistency perfect for piping. This is your outlining icing, ready to go, or you can use it as a base for thick details. If you need that beautiful, flowing texture for flooding, you have to thin it down ever so slightly.
Achieving Flood Consistency Icing
This is the tricky part everyone messes up—trying to guess how much water to add. Don’t guess! Take a spoonful of that stiff icing you just made and thin it one teaspoon of water at a time. You are aiming for what we call the 10-second rule. Drizzle some of that thinned icing over the top of the bowl. If the trail you leave disappears back into the main icing within about 10 seconds, you nailed it! That’s your perfect *flood consistency icing*. If it vanishes instantly, you added too much water, so grab a bit of your stiff batch to build it back up. This rule is critical for that smooth finish on your cookie decorating icing. For more deep dives on professional tricks, check out this excellent guide here.
Tips for Perfect Piping Icing Tutorial Results
Now your royal icing recipe is mixed, but the real fun—and potential for mess—starts now! You need to keep your consistencies straight for the best results. Remember the stiff icing we made first? That’s what you use for outlining. It holds a sharp edge and creates that dam the floods need. If your outline seems too thick for tight detail work, grab a few drops of water and mix just that small batch until it’s softer. Don’t overdo it!
For everything else—filling in those outlined areas—you need that thinner flood consistency we perfected using the 10-second rule. The trick to keeping that beautiful, glossy look is managing air. If you’re using a vibrant gel color, mix it gently by hand with a spatula, not the mixer! Adding color too aggressively whips air into the icing, and those bubbles pop up later on your cookie surface.
Here’s a pro move I picked up early on: If you see tiny bubbles forming after you’ve added your color, don’t panic! Gently push your icing through a fine-mesh sieve right into your piping bag. It feels a little extra, I know, but cleaning up those little air blemish craters is way harder than just sieving it once. This simple step is key for achieving that smooth texture that makes for a brilliant piping icing tutorial finish.
Coloring and Storing Your Royal Icing Recipe
When you go to color your batches, remember to always start small with the food coloring. Gel colors are potent; you can always add more, but you can’t really take it out if you accidentally make it too dark! For a successful royal icing guide, the biggest thing is storage.
Icing hates open air. It dries faster than anything, turning into a useless, cracked brick if you leave it exposed for five minutes! Seriously, if you are taking a break between flooding cookies, cover *every* bowl immediately. Press plastic wrap directly onto the surface of the icing mixture. If you can’t press it down, dampen a paper towel and lay that gently over the top of the icing before covering the bowl with plastic—that works wonders against drying when waiting for the outline to set.
Troubleshooting Common Royal Icing Recipe Issues
Even with the best royal icing recipe, sometimes things just don’t go perfectly when you’re decorating. Don’t stress! This icing is forgiving, which is why I love it. If your icing is way too thin when you wanted stiff consistency for piping, the fix is easy: just mix in powdered sugar, a tablespoon at a time, until it feels right.
What if you accidentally threw in too much water and now it’s a soupy mess? Don’t reach for the meringue powder again—that stuff has already done its job! Instead, take a small portion of the thin icing and vigorously beat in a tiny bit more sifted sugar until you build back that necessary stiffness. If your finished cookies are cracking after they dry, that usually means you used too much water in the flood consistency, or you didn’t let the outline dry enough before flooding.
Making Ahead and Storing Your Icing That Dries Hard
One of the huge perks of using this meringue powder-based royal icing recipe is that you can totally make it ahead of time. You aren’t stuck needing to decorate right away, which is a lifesaver around the holidays when the oven is running nonstop!
For short-term storage—say, overnight or even two days—just seal that icing tightly. Remember what I said: plastic wrap pressed directly onto the surface inside an airtight container is your best friend. You can keep it on the counter, away from heat, or in the fridge. If it goes in the fridge, that’s totally fine, but be warned: it will thicken up substantially. Don’t even attempt to use it cold!
When you pull it out again, let it come to room temperature completely—maybe give it an hour on the counter. It will look stiff and almost unusable. Don’t panic! That’s normal for an easy cookie icing that’s designed to dry hard. You just need to wake it up. Add water in *tiny* increments—seriously, I mean half a teaspoon at a time—and stir it in gently with a spatula. You don’t want to whip air back into it, so fold it slowly until it flows like it did when you first made it. This revival process keeps your *icing that dries hard* totally usable for days!
Serving Suggestions for Your Cookie Decorating Icing
Now that you have mastered the ultimate royal icing recipe, the real question is: what are you going to put this gorgeous, sturdy icing on? Because this icing dries so incredibly firm and gives you that beautiful, glossy cookie icing shell, it’s truly versatile. It holds up way better than standard buttercream, which tends to get soft and messy.
Obviously, your basic cut-out sugar cookies are the number one candidate. Whether they are simple rounds or intricate holiday shapes, this recipe works perfectly. But don’t stop there! This icing is fantastic when you need something sturdy enough to stand up to handling or stacking. Think detailed designs on gingerbread cookies—you can build up layers with this icing, and it won’t collapse.
Another favorite of mine is using this for decorating simple shortbread cookies. The buttery, crumbly texture of those whipped shortbread cookies plays so nicely against the crisp sweetness of the icing. It really elevates a simple cookie into something that looks totally professional.
If you are planning for the holidays, this recipe is mandatory. It’s the standard for making detailed Christmas cookies or even decorating something like a DIY gingerbread house—it acts as the perfect structural ‘glue’ and facade. Go ahead and start sketching out those designs!
Frequently Asked Questions About This Royal Icing Recipe
I know that when you’re trying out a new royal icing recipe, you’re going to have some lingering questions. That’s totally normal! When I was learning the lingo, I had pages of notes just for troubleshooting. I pulled together the ones I hear the most often about getting that perfect, durable finish that makes an **easy cookie icing** shine. Hopefully, this handles whatever doubts you have about mixing, drying, or storing your batch.
Can I use regular egg whites instead of meringue powder in this royal icing recipe?
You definitely *can*, but here’s the translation: raw egg whites are way less stable. If you use them, you need to be careful about food safety since they aren’t pasteurized unless you buy specific ones. The biggest difference is consistency control. Meringue powder is much more reliable for hitting that perfect stiff texture needed for high-quality *cookie decorating icing*. If you substitute, you’ll need less liquid overall because egg whites are mostly water, so start cutting back on those 6 tablespoons of water right away! Check out what this source says about the switch, too.
How long does this icing take to dry hard?
This is where the magic of the meringue powder really pays off. Because this is designed to be an *icing that dries hard*, it usually sets up pretty quickly. If you’ve flooded a cookie thinly, it can be touchable in about 30 minutes, but for a truly hard, stackable finish, give it 4 to 6 hours at room temperature. If your kitchen is super humid—like, summer in the South humid—it might take overnight for that super crisp, **glossy cookie icing** shell to form completely. Don’t try to speed it up with the oven unless you want things to crack!
I need a reliable baking icing for piping details; how stiff should my icing be?
If you’re doing fine line work, you want the stiffest consistency straight out of the mixer—that’s the stage *before* you start adding water for flooding. It should stand up in nice, defined peaks on the beater and hold its shape completely when you lift it up. If it slumps even a tiny bit, it means you need to beat it longer or add just a half-teaspoon more powdered sugar to bring it back to that peak stiffness. This is key for getting those sharp edges we love in any good *piping icing tutorial*!
Why do I need to use clear vanilla extract?
This is a small, pro move adopted from my bistro days. Standard vanilla extract is brown! If you’re making bright white icing for something simple or pale pastels, that brown color dulls everything down. Clear vanilla extract is colorless, allowing your food gels to shine through true to color. When you’re aiming for that flawless, *bakery style icing*, every little tweak helps you achieve that brilliant look!
Rate This Reliable Baking Icing
I’ve given you the blueprint, the lingo, and all the tips I know to translate this tricky skill into easy success. Now it’s your turn! Tell me how this *royal icing recipe* worked for you in your kitchen. Do you have a favorite way to use this icing? Are your holiday cookies looking ridiculously professional?
I always love seeing what you all create with this formula. Drop a comment below and let me know your favorite part of the process—maybe it’s finally getting that perfect flood consistency, or perhaps you’re thrilled with how well your **sturdy icing decorations** held up after shipping them across the country. Your feedback helps me keep translating the best kitchen techniques for everyone! If you are looking for a completely different flavor profile next time, make sure you check out my easy chili recipe—it’s a whole different kind of comfort food!
If you found this guide helpful, remember that knowing the ‘why’ behind the mix always speeds up your learning curve. Happy decorating!
PrintThe Ultimate Easy Royal Icing Recipe: Smooth, Stable, and Perfect for Cookie Decorating
This reliable royal icing recipe uses meringue powder to give you smooth, glossy icing that dries hard. It is perfect for beginners learning to outline and flood sugar cookies.
- Prep Time: 10 min
- Cook Time: 0 min
- Total Time: 10 min
- Yield: Covers about 3 dozen medium cookies 1x
- Category: Baking
- Method: Mixing
- Cuisine: American
- Diet: Vegetarian
Ingredients
- 3 tablespoons meringue powder
- 4 cups powdered sugar, sifted
- 6 tablespoons warm water
- 1 teaspoon clear vanilla extract
Instructions
- In a large bowl, combine the meringue powder and warm water. Beat with an electric mixer on medium speed for about 3 minutes until the mixture is foamy and holds soft peaks.
- Gradually add the sifted powdered sugar to the meringue mixture while mixing on low speed.
- Once combined, add the clear vanilla extract. Increase the mixer speed to medium-high and beat for 5 to 7 minutes until the icing is very stiff, bright white, and glossy. This is your stiff piping consistency.
- To achieve flood consistency icing, add water one teaspoon at a time, mixing well after each addition, until the icing flows smoothly off the mixer beater and the trail disappears into the bowl within 10 seconds.
- To achieve outlining consistency, use the stiff icing as is, or thin slightly with just a few drops of water if needed.
- Separate the icing into bowls for coloring. Cover all unused icing with a damp cloth or plastic wrap pressed directly onto the surface to prevent drying.
- Use immediately for decorating cookies.
Notes
- For the glossiest finish, use clear vanilla extract instead of standard vanilla extract.
- If you see air bubbles after mixing, gently press the icing through a fine-mesh sieve to remove them before coloring.
- This icing dries firm and hard, making it ideal for stacking or packaging decorated cookies.
Nutrition
- Serving Size: 1/4 cup
- Calories: 180
- Sugar: 45
- Sodium: 15
- Fat: 0
- Saturated Fat: 0
- Unsaturated Fat: 0
- Trans Fat: 0
- Carbohydrates: 45
- Fiber: 0
- Protein: 1
- Cholesterol: 0