

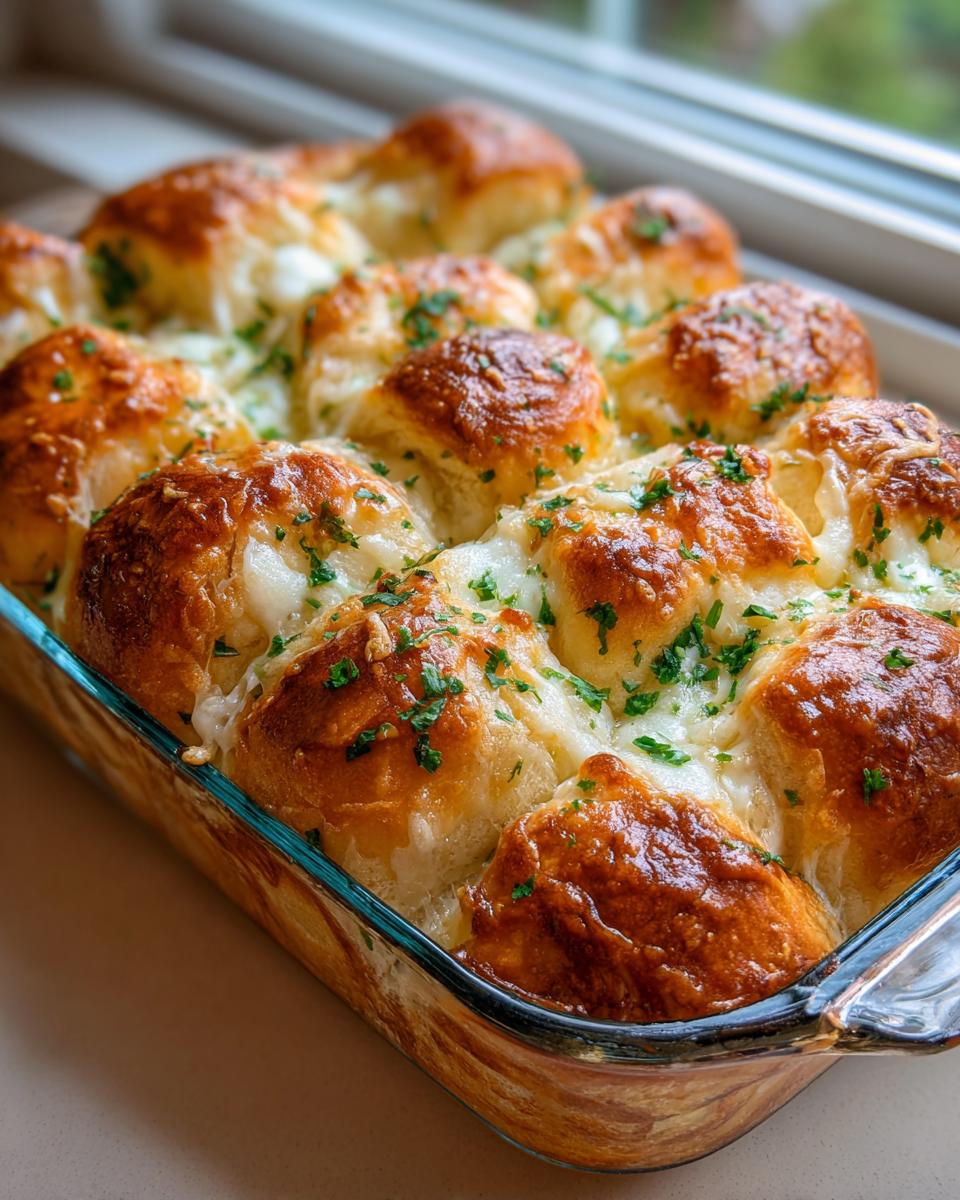
Okay, stop whatever you’re doing and listen up, because I have cracked the code on the internet’s favorite carb experience. We all need that ultimate comfort food side—the thing that disappears before the main course even hits the table. Forget the boring, stiff garlic bread from the freezer aisle; we are diving headfirst into the absolute easiest, cheesiest, most viral sensation: the Hawaiian roll garlic bread.
When I work in the kitchen, coming straight from translating those sometimes scary, professional chef moves into something you can whip up in five minutes, I promise you this recipe is solid gold. It uses those famous sweet rolls but transforms them into a savory delight that absolutely screams crowd-pleaser. Seriously, keeping these rolls connected means the bread stays unbelievably soft inside while the top gets that garlicky, cheesy crust we all dream about. This isn’t just bread; it’s a shortcut to happy eaters, and trust me, it’s foolproof.

If you love how easily these rolls transform from sweet to savory, you might also flip out over my recipe for ham and cheese sliders—they use the same amazing base!
- Why This Cheesy Hawaiian Roll Garlic Bread is a Must-Make
- Gathering Ingredients for Perfect Hawaiian Roll Garlic Bread
- Step-by-Step Instructions for Cheesy Hawaiian Roll Garlic Bread
- Tips for the Best Hawaiian Roll Garlic Bread Results
- Serving Suggestions for Your Quick Dinner Side Dish Rolls
- Storage and Reheating Instructions for Soft Garlic Bread
- Frequently Asked Questions About Hawaiian Roll Garlic Bread
- Nutritional Estimates for Cheesy Hawaiian Rolls Appetizer
- Share Your Experience Making This Comfort Food Bread Side
Why This Cheesy Hawaiian Roll Garlic Bread is a Must-Make
I know you’re busy, so let me tell you why this cheesy version is going straight onto your standard rotation. It ticks every single box for a fuss-free, flavor-packed side dish. It’s honestly magical how we get such big results from such little effort.
- It’s the perfect crowd pleasing appetizer rolls! Everyone fights over these buttery mounds.
- The texture contrast is incredible—that sweet and savory combo makes it the ultimate sweet and savory bread side.
Ultimate Softness and Flavor Profile
You get that famous pillowy soft interior from the rolls themselves, but we top it with edges that get just a little crisp from the baking and the melted cheese. That slight sweetness from the original roll base cuts through the sharp garlic and salt so beautifully. It’s that sweet spot savory cooks chase!
Speed and Simplicity for Weeknights
Honestly, half the reason this blew up online is how fast it cooks. We’re talking totally doable, less than thirty minutes start-to-finish. If you need a stellar side dish that feels way more complex than it is, this makes for a fantastic easy garlic bread rolls option. It’s basically a 20 minute garlic bread fantasy!
Gathering Ingredients for Perfect Hawaiian Roll Garlic Bread
Okay, I always say you can’t build a masterpiece on a shaky foundation, and that goes for bread, too! We need to talk about what goes into this magic, because getting the ingredients right is exactly how we go from sweet roll to savory legend. Don’t worry, you won’t need a map or six hours of foraging. Everything here is simple, but trust me, the quality matters, especially for that gorgeous garlic parmesan hawaiian rolls flavor!
The Base: King’s Hawaiian Rolls
You absolutely must start with the real deal. I’m talking about the full package—the 12 count of King’s Hawaiian rolls. These rolls are non-negotiable! What makes them so special is that slight sweetness and that crazy high moisture content. When you bathe them in garlic butter, they don’t dry out; they just get softer and fluffier. That’s the secret to that incredible soft garlic bread recipe texture.
Crafting the Sweet Roll Garlic Butter
This butter blend is where the big flavor comes from. You’ll need half a cup of melted unsalted butter—keep it simple, no margarine here, please! Then we load it up: four cloves of garlic, minced super fine—and I mean fresh, not the jarred stuff, your senses deserve better! We’re also adding fresh parsley, a bit of dried oregano for that classic Italian note, and just a pinch of salt and pepper to make all those flavors pop.
The Cheesy Topping for Garlic Cheese Rolls Recipe
If you want to elevate this from a side dish to a show-stopping cheesy hawaiian rolls appetizer, you have to bring the cheese. We are layering here! You want a good cup of shredded mozzarella—that’s for the melt and the glorious pull—and then a quarter cup of grated Parmesan sprinkled right on top for that salty, nutty crust. This combination ensures every single bite is rich!
Step-by-Step Instructions for Cheesy Hawaiian Roll Garlic Bread
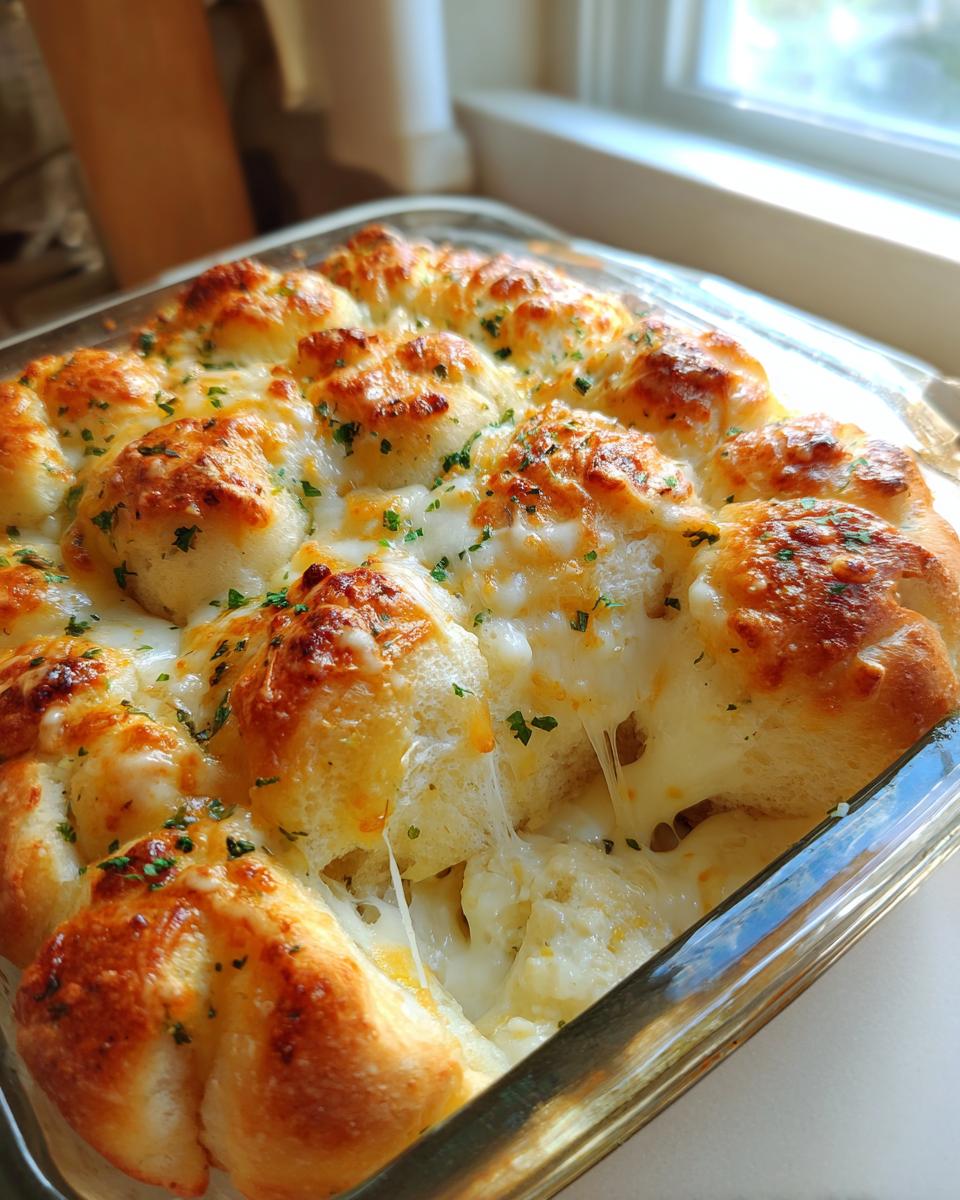
Alright, this is where the magic happens, and I promise it moves fast, so have your supplies ready! Since this is going to be that amazing buttery pull apart bread we crave, our goal is deep flavor saturation without separating the rolls too early. We want that soft, unified interior when we pull them apart later. Follow these steps exactly, and you’re looking at a heavenly soft garlic bread recipe in under half an hour.
Prep Work: Oven and Roll Preparation
First things first: tell your oven to warm up to 350°F (175°C). Now, grab that little package of King’s Hawaiian rolls and keep them snug in their plastic wrap or place the entire attached block right into an 8×8 baking dish. This next step is critical for that flavor soak. You need to carefully slice the whole block horizontally—like you’re butterflying a big piece of food—but stop before you cut all the way through the bottom seam connecting them. We’re creating pockets for the butter! This is my way of making sure the flavor gets where it needs to go, building trust that this recipe works perfectly.
Applying the Garlic Butter and Layering Cheese
Take that glorious garlic butter concoction we mixed up and use a pastry brush or just drizzle it deliberately over the cut surfaces. Make sure that herby, garlicky goodness seeps down in between every single roll. Don’t be shy! Once everything is coated nicely, spread that cup of mozzarella cheese evenly over the tops. Follow that up with a generous dusting of Parmesan cheese right on top of the mozzarella. This layering is how we guarantee a golden, bubbly finish, especially if you’re aiming for that garlic parmesan hawaiian rolls vibe later on.
Baking Sequence for Soft Garlic Bread Recipe
We bake in two stages here! First, cover that dish loosely with aluminum foil. This traps the steam and makes sure the rolls inside get perfectly soft and soak up all that flavor. Bake covered for exactly 10 minutes. Then, take the foil off! You want that cheese to brown up beautifully. Stick it back in the oven uncovered for another 5 to 7 minutes. Pull them out as soon as the cheese is bubbly and just starting to turn golden brown at the edges. You have to serve these right away—they are just heavenly when they are piping hot!
If you want to see how someone else tackles this viral sensation, I saw a great technique over on this great recipe that does a fantastic job showing the finished product!
Tips for the Best Hawaiian Roll Garlic Bread Results
We’ve nailed the basic steps, but let’s talk about leveling up. If you want to ensure this turns into the absolute best way to make hawaiian rolls savory, you need these little chef secrets. These small tweaks really make the difference between good bread and totally unforgettable bread.
Flavor Boosters for Your Garlic Butter
The standard recipe is amazing, naturally, but sometimes I like to add a little something extra to that garlic butter blend. Throwing in about half a teaspoon of onion powder alongside the garlic really deepens the savory notes. Or, if you’re feeling a little smoky, a tiny dash of smoked paprika introduces this incredible background warmth. It takes maybe five extra seconds, but wow, does it change the landscape of flavor!
Maintaining the Pull-Apart Integrity
This is where people sometimes go wrong! If you want that beautiful, soft, almost cake-like interior texture, you absolutely must keep the rolls connected when you slice and butter them. If you separate them before baking, the edges dry out instantly. Keeping them whole allows the steam created under the foil to work its magic. You can certainly tear them apart afterwards to serve, maybe even grab some easy garlic naan bread inspiration for a chewy texture, but keep them together until they hit the oven tray!
Serving Suggestions for Your Quick Dinner Side Dish Rolls
These cheesy garlic rolls are so versatile, they practically beg to be served with everything! Since they carry that little bit of sweetness, they pair incredibly well with spicier, richer main courses. They are the perfect dipping tool for a hearty bowl of easy chili recipe—I mean, imagine that sweet dough soaking up that savory heat!

They are fantastic alongside any saucy pasta dish, like lasagna or baked ziti, because who doesn’t want bread covered in garlicky cheese to mop up extra sauce? If you’re looking for something truly special for a big gathering, these are ideal as holiday side dish rolls. They look impressive piled high on a platter, but they are ready in the blink of an eye. Truly, they are the definition of a supreme comfort food bread side.
Storage and Reheating Instructions for Soft Garlic Bread
Now, let’s be honest, these rarely last long enough to worry about storage, right? But if, by some miracle, you have any of this glorious, cheesy goodness left over, you need to know how to treat them right. We want to bring them back to that original, pull-apart, melty state, not turn them into little doughy hockey pucks!
First, let them cool completely if you managed to save any. Store leftovers in an airtight container. The key here is moisture retention. If you just leave them out uncovered, that beautiful soft texture we worked so hard for turns dry immediately. Don’t let that happen!
When you get the craving later—because you totally will—avoid the microwave if you can. The microwave sometimes makes the bread spongy and reheats the cheese weirdly. The absolute best way to revive this soft garlic bread recipe is low and slow in the oven. Set your oven to a very gentle 300°F (150°C).
Wrap the rolls (still attached if possible) tightly in a piece of aluminum foil. This creates a little steam tent and rehydrates the bread layer by layer without burning the garlic butter or blasting the cheese. Heat them for about 8 to 10 minutes. You should be able to smell the garlic gently warming up again. If the cheese hasn’t fully melted yet, just open the foil for the last two minutes. That warm, buttery steam coming off the rolls is pure heaven!
Frequently Asked Questions About Hawaiian Roll Garlic Bread
I always get questions about tinkering with this recipe, which is great because it means you’re ready to get creative! Since this is such a phenomenal quick dinner side dish rolls base, people want to customize it. Here are the things I hear most often when folks are making their very first batch of this cheesy pull-apart bread. If you’re looking for other dips to pair with this bread, you should totally check out my instructions for a creamy jalapeno popper dip—it’s amazing for dipping!
Can I make this Hawaiian Roll Garlic Bread without cheese?
Oh, absolutely! If cheese isn’t your thing, or if you just ran out, skip it! It totally changes the profile, though; without the mozzarella and Parmesan, you really get to lean into the sweet and savory nature of the sweet roll garlic butter. It becomes more focused on the herb infusion, which is still delicious!
What is the best way to make this a viral tiktok garlic rolls recipe?
If you want to make your rolls look like they just walked off a trending video, you need a finishing touch! After they come out of the oven and while the cheese is still hot, drizzle lightly with honey. That extra pop of sweetness looks amazing! Alternatively, a heavy sprinkle of everything bagel seasoning right when they come out is super popular right now. Check out how they do it on this viral roundup for inspiration!
Can I use different herbs instead of oregano in the sweet roll garlic butter?
Yes! I love oregano, but feel free to swap it out. Thyme works beautifully, especially if you’re serving this alongside something like roast chicken. Rosemary is another fantastic option, but hey, use less of it because it’s potent! Sometimes I’ll even mix dried thyme and a little bit of sage for a more autumnal feeling, especially when serving it as a holiday side dish rolls option. Don’t be afraid to experiment with your spices!
Nutritional Estimates for Cheesy Hawaiian Rolls Appetizer
Now, I’m not a nutritionist, so take these numbers with a grain of salt—or maybe a grain of Parmesan cheese! But I pulled the general estimates for one roll right from my notes so you have a baseline for this sweet and savory treat. Remember, we are working with rolls that have sugar and cheese, so they lean toward the decadent side, perfect for a special side or appetizer rather than an everyday staple.
Here’s a rough idea of what you’re looking at per roll:
- Serving Size: 1 roll
- Calories: 220
- Fat: 13g
- Saturated Fat: 7g
- Carbohydrates: 22g
- Sugar: 9g
- Protein: 5g
This is just an estimate based on the standard ingredients list, so if you add extra cheese or use a different butter blend for your easy weeknight dinners, numbers might shift a little. But honestly, when they taste this good, who is counting calories? Just make double the batch because these disappear faster than you can clean the baking dish!
Share Your Experience Making This Comfort Food Bread Side
Whew, we made it through! I honestly hope your kitchen smells as heavenly covered in buttery garlic as mine does right now. This Hawaiian roll garlic bread is one of those recipes that just feels like a hug on a plate, and seeing you all enjoy it is my very favorite part of running this site.
If you followed along and pulled those golden, cheesy rolls out of the oven, please, please leave me a rating below! Your feedback helps everyone else know just how simple and awesome this is. Did your kids devour their portion immediately? Did you manage to save any for the next day? Tell me everything!
And you know I live for photos! If you snapped a gorgeous shot of your cheesy, pull-apart sides—especially if they’re piled next to your pasta or soup—tag me on social media. I love reposting your successes! I want to see how you made this easy garlic bread rolls masterpiece your own.
Thanks so much for stopping by Kitchen Slang. Head over to my About Page if you want to learn more about why I’m here translating all this kitchen lingo for you. Now go enjoy those unbelievably soft rolls!
PrintCheesy Hawaiian Roll Garlic Bread (Quick and Easy)

Make soft, buttery, and cheesy garlic bread using King’s Hawaiian rolls. This recipe is fast, simple, and perfect as a crowd-pleasing side dish or appetizer.
- Prep Time: 10 min
- Cook Time: 17 min
- Total Time: 27 min
- Yield: 12 rolls 1x
- Category: Side Dish
- Method: Baking
- Cuisine: American
- Diet: Vegetarian
Ingredients
- 1 package (12 count) King’s Hawaiian sweet rolls
- 1/2 cup unsalted butter, melted
- 4 cloves garlic, minced
- 1/4 cup fresh parsley, chopped
- 1/2 teaspoon dried oregano
- 1/4 teaspoon salt
- 1/4 teaspoon black pepper
- 1 cup shredded mozzarella cheese
- 1/4 cup grated Parmesan cheese
Instructions
- Preheat your oven to 350°F (175°C). Keep the Hawaiian rolls connected in their original packaging or place them in an 8×8 inch baking dish.
- In a small bowl, combine the melted butter, minced garlic, chopped parsley, oregano, salt, and pepper. Mix well to create the garlic butter mixture.
- Carefully slice the entire block of rolls horizontally, keeping the rolls connected at the bottom seam. Do not cut all the way through.
- Brush the garlic butter mixture generously over the cut surfaces of the rolls, making sure the butter seeps down between each roll.
- Sprinkle the mozzarella cheese evenly over the buttered tops. Then, sprinkle the Parmesan cheese over the mozzarella.
- Cover the baking dish loosely with aluminum foil.
- Bake for 10 minutes.
- Remove the foil and bake for an additional 5 to 7 minutes, or until the cheese is melted, bubbly, and lightly golden brown.
- Serve immediately while warm and soft.
Notes
- For an extra savory flavor, add 1/2 teaspoon of onion powder to the garlic butter.
- If you want a pull-apart appetizer, you can separate the rolls slightly before brushing the butter, but keeping them connected yields the softest result.
- This bread pairs well with pasta dishes, chili, or soup.
Nutrition
- Serving Size: 1 roll
- Calories: 220
- Sugar: 9
- Sodium: 350
- Fat: 13
- Saturated Fat: 7
- Unsaturated Fat: 6
- Trans Fat: 0.3
- Carbohydrates: 22
- Fiber: 1
- Protein: 5
- Cholesterol: 30